Recessed lighting, often referred to as canned lighting, is a popular choice in many homes because it works well with various décor styles and is incredibly functional. Though replacing a burned-out light bulb can be a daunting task, especially if you’ve never done it before, it’s a simple process once you have the right equipment and knowledge. In this guide, we will walk you through the steps to change a light bulb in recessed lighting, ensuring a safe and efficient DIY recessed lighting bulb replacement process.
Key Takeaways
- Changing a light bulb in recessed lighting can be done easily with the right tools and knowledge
- It’s important to always prioritize safety during the light bulb replacement process
- Understanding your specific recessed lighting setup is crucial for a successful bulb replacement
- There are different types of recessed light bulbs, such as twist-lock bulbs and spring clips
- Switching to LED bulbs for your recessed lighting fixtures can lead to energy efficiency and long-lasting performance
Introduction to Recessed Lighting
Recessed lighting fixtures, commonly referred to as canned lighting, are an increasingly popular choice in homes due to their ability to seamlessly blend into ceilings or walls. These fixtures are designed not only to provide a streamlined look without being obtrusive, but also with the ease of recessed lighting light bulb replacement in mind, making it relatively straightforward to switch out a bulb when needed, be it due to burnout or for an upgrade.
There is a wide variety of recessed lighting styles available, making it possible to find the right fit for your specific requirements. Typically, these lights are categorized based on their housing style (new construction or remodel), and the type of trim installed (open, baffle, or adjustable). To make an informed decision when replacing light bulb in recessed lighting, homeowners must consider factors such as their existing lighting fixtures, ceiling height, and the desired ambiance.
Moreover, knowing the different types of light bulbs suitable for recessed lighting will make the replacement process more effortless. Here is a general overview of the most common types of light bulbs used in recessed lighting:
- Incandescent
- Compact Fluorescent (CFL)
- Halogen
- Light Emitting Diode (LED)
Each type of light bulb has its advantages and disadvantages, which homeowners should weigh carefully before selecting the most suitable option for their needs. Some factors to consider include energy efficiency, light temperature, bulb lifespan, and overall cost.
Preparation: The Essentials Before You Start
Before diving into the process of changing a light bulb in recessed lighting, it’s essential to be well-prepared with the right tools, materials, and safety measures. Having a clear understanding of your specific recessed lighting setup is crucial for a smooth and successful light bulb replacement.
Gathering Tools and Materials
To execute a light bulb replacement in recessed lighting, certain tools and materials are required. These include a compatible replacement bulb, a sturdy ladder, a screwdriver (for potential trim removal), and, optionally, gloves and safety glasses for protection. Make sure to research the appropriate bulb type for your specific recessed fixtures to ensure compatibility.
Safety Measures for Light Bulb Replacement
Electrical safety is of the utmost importance when it comes to changing a light bulb in recessed lighting. Be sure to follow these safety tips:
- Turn off the power at the circuit breaker.
- Allow heated bulbs to cool before attempting to remove them.
- Wear protective gear, such as gloves and safety glasses, if necessary.
- Optionally, use a voltage tester to ensure the power is genuinely off before attempting replacement.

Understanding Your Recessed Lighting Setup
DIY recessed lighting bulb replacement can be simple, but it’s essential to understand your specific recessed fixtures. The process may slightly differ depending on the type of recessed lighting and bulb used. Take note of how the bulb is secured within the housing, such as with clips or a twist-lock mechanism, in order to safely and correctly perform the replacement. Familiarize yourself with the components of your lighting setup, and adjust your approach accordingly for a smooth and successful bulb replacement experience.
How to Change a Light Bulb in Recessed Lighting
Changing a light bulb in recessed lighting can be a straightforward process. By following a few simple steps, you can replace the old bulb and enjoy a well-lit room in no time. This quick guide to changing a light bulb in recessed lighting will help you accomplish this task safely and efficiently.
- Turn off the power: Safety always comes first. Before attempting to change the light bulb, make sure the power is turned off at the circuit breaker.
- Allow the bulb to cool down: If the bulb has recently been on, wait a few minutes to allow it to cool down before attempting removal.
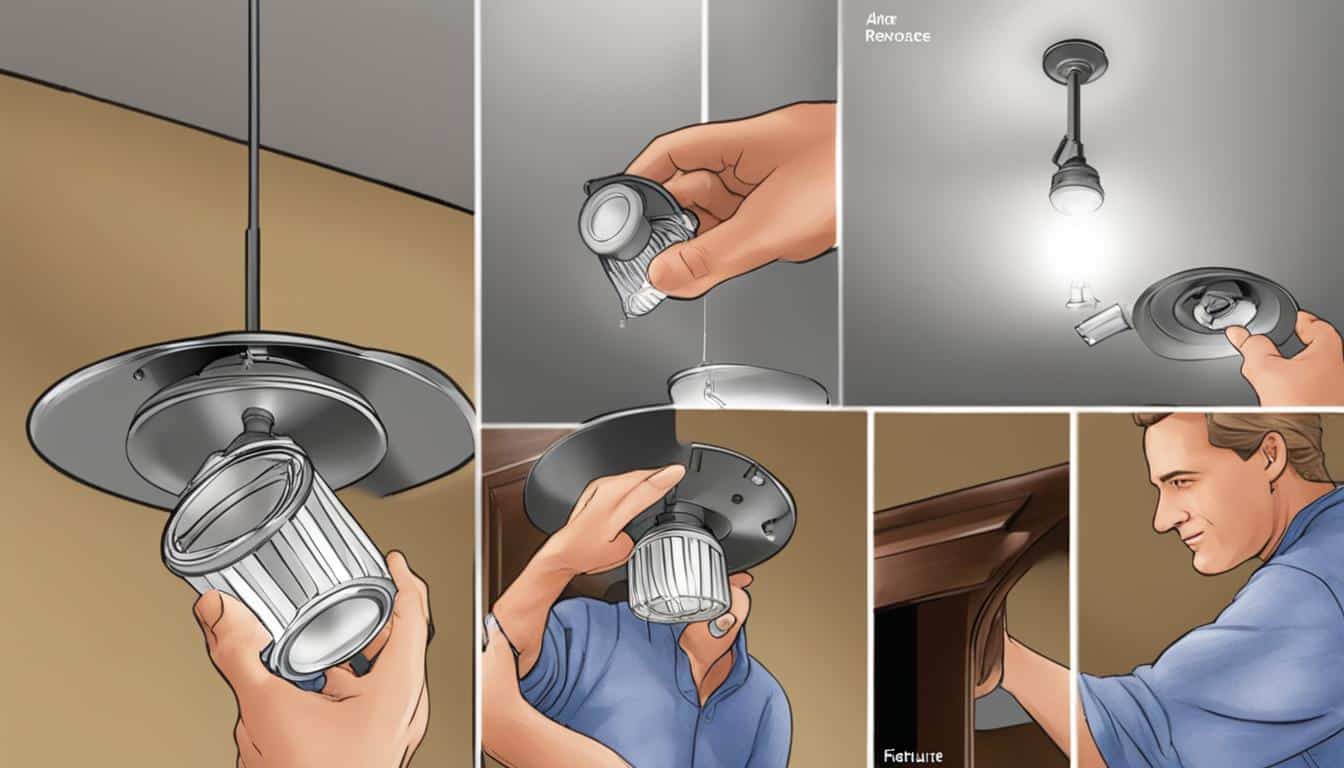
- Remove the old bulb: Depending on your specific recessed lighting setup, this step might involve pressing the release clips or turning the bulb for twist-lock types. Gently release the bulb from its socket without applying too much pressure.
- Install the new bulb: Carefully handle the new bulb and align it with the socket. Insert the new bulb into the socket, making sure it is snug but not over-tightened. If you have a twist-lock type, turn the bulb clockwise to secure it into position.
- Turn the power back on: Once the new bulb is properly installed, turn the power back on at the circuit breaker and test the light to ensure it is functioning correctly.
By following these steps to change a light bulb in recessed lighting, you can successfully replace old or burned-out bulbs with ease. Always remember to prioritize safety throughout the process, and before you know it, you’ll have a well-lit space once again.
Identifying Different Recessed Light Bulb Types
When replacing light bulbs in recessed lighting, it’s essential to understand the different bulb types and mechanisms used to secure them. In this section, we’ll explore twist-lock bulbs, spring clip bulbs, and the differences between BR30 and BR40 sizes.
Twist-Lock Bulbs
One common type of recessed lighting light bulb is the twist-lock bulb. This bulb is locked in place by being inserted into the socket and turned clockwise. To replace a twist-lock light bulb in recessed lighting, simply turn the bulb counter-clockwise to unlock it. When installing a new bulb, ensure it is aligned properly with the socket’s grooves for a secure fit.

Understanding Spring Clips
Another method of securing light bulbs in recessed lighting is with spring clips. Replacing light bulbs with spring clips in recessed lighting involves gently squeezing the clips and pulling the bulb downward. When installing a new bulb, spread the spring clips to secure the bulb firmly within the housing.
Comparing BR30 versus BR40 Bulbs
Recessed lights come in different can diameters, which determine the compatible bulb sizes. Generally, 4-inch diameter cans are suited for BR30 bulbs, while 6-inch diameter cans accommodate BR40 bulbs. The table below summarizes the key differences between BR30 and BR40 sizes:
| Size | Diameter | Compatible Recessed Can Diameter |
|---|---|---|
| BR30 | 3.75 inches (95mm) | 4-inch diameter cans |
| BR40 | 5 inches (127mm) | 6-inch diameter cans |
When selecting a new bulb for your recessed lighting, ensure you choose the appropriate size based on your recessed can’s diameter for a seamless fit and proper functioning.
Step-by-Step Process: Removing the Old Bulb
Changing recessed light bulbs might seem intimidating at first, but following a simple step-by-step process will ensure a seamless and safe experience. This section outlines various techniques to gain access to recessed lighting, remove the old bulb, and handle different bulb-locking mechanisms.
Gaining Access: Removing Trims and Baffles
Before you can replace a light bulb in recessed lighting, you might need to remove trim or housing components to access the light bulb itself. This process usually involves unscrewing fasteners or handling clips and can be completed with minimal effort once you understand how the fixture is structured.
Techniques to Release the Bulb from Spring Clips
Some recessed lighting fixtures use spring clips to hold the bulb in place. To remove the bulb, simply press and squeeze the clips with care, avoiding any forceful movements that could potentially damage the housing or the bulb. Releasing the spring clip bulb is an easy way to replace a light bulb in recessed lighting when executed carefully.
Handling Twist-Lock Mechanisms Safely
Twist-lock bulbs require a different approach for their removal. When changing twist-lock light bulbs, it’s essential to apply just enough pressure to release the bulb safely without causing damage to the socket or the bulb itself. Gently twist the bulb counter-clockwise until it unlocks from its secured position, assuring a secure and safe procedure.
In conclusion, learning how to change recessed light bulbs comes down to understanding and applying the proper techniques for accessing and removing different types of bulbs. By adhering to these guidelines, you can ensure a safe and efficient recessed lighting bulb replacement process.
Installing the New Light Bulb in Recessed Lighting
With the old bulb safely removed, it’s time to install the new recessed light bulb. The process may differ slightly among bulb types, but generally follows similar steps. Here is a quick guide on how to change a light bulb in recessed lighting, regardless of the type of bulb:
- Choose the right replacement bulb for your recessed fixture. Ensure that it is compatible in terms of size, wattage, and base type.
- Position your ladder securely beneath the fixture, making sure it is stable and enables you to reach the installation site comfortably and safely.
- Check one more time that the power is off at the circuit breaker to avoid any electrical hazards.
- Align the new bulb with the socket, paying attention to any specific requirements for your particular bulb type:
- For a standard push-in socket, insert the bulb and press gently until it sits securely.
- For a twist-lock type, align the bulb’s base with the socket’s grooves, then gently twist the bulb clockwise to lock it in place.

By following these steps, you will have successfully replaced the light bulb in your recessed lighting fixture. This process is relatively simple and requires only limited knowledge and preparation. Whether upgrading to a more energy-efficient bulb or dealing with a burned-out one, understanding how to change a light bulb in recessed lighting is an essential DIY skill for homeowners.
Troubleshooting Common Problems When Replacing Bulbs
Replacing a light bulb in recessed lighting can sometimes present challenges. Whether you are dealing with a stuck bulb, power issues, or incompatible bulb sizes, this section will discuss some effective solutions for each common problem.
Dealing With Stuck Bulbs
One of the most common issues when changing a light bulb in recessed lighting is a stuck bulb. To address this problem, you might need to utilize a few tricks for changing stuck light bulb in recessed lighting. Try gently turning the bulb back and forth first, using gloves for better grip. If this method doesn’t work, you can resort to specialized tools like needle-nose pliers or a suction cup tool to safely remove the bulb.
What To Do If Power Is Not Restored
After replacing a light bulb in recessed lighting, if the power still doesn’t get restored, there might be some recessed lighting power issues that need addressing. Check whether the new bulb is screwed tightly enough into the socket, and make sure the power is turned back on at the circuit breaker. If the problem persists, consider contacting an electrician for further support.
Solutions for Incompatible Bulb Sizes
Ensuring that you use the correct bulb size for your recessed lighting fixture is crucial to avoid problems during replacement. To adjust for incompatible light bulb sizes, check the dimensions and wattage of the recessed lighting can and match them accordingly with the proper bulb types, such as BR30 or BR40. Familiarize yourself with recessed lighting fixture compatibility specifications to guarantee a smooth and successful light bulb replacement process.
LED Options for Recessed Lighting Upgrades
Upgrading your recessed lighting with LED bulbs can lead to numerous benefits that not only enhance the ambiance of your space, but also reduce energy consumption and minimize maintenance. In this section, we will explore the benefits of LED lighting, how to select LED bulbs for recessed fixtures, and the longevity and efficiency of LED options.

Benefits of Switching to LED
Switching to LED light bulbs for your recessed lighting provides several advantages, such as:
- Energy-efficient LED lighting resulting in lower electricity bills
- Longer lifespan than traditional bulbs, reducing the frequency of replacements
- Wide range of lighting temperatures and colors to create the desired ambiance
How to Select LED Bulbs for Recessed Fixtures
Choosing the right LED bulbs for your recessed fixtures involves taking into account several factors, including:
- Compatibility with the housing and existing fixtures
- Desired brightness (measured in lumens)
- Color temperature for ambiance (measured in Kelvins)
- Energy consumption for efficiency (measured in watts)
The Longevity and Efficiency of LED Lighting
One of the main selling points of LED bulbs is their long-lasting nature, which means you won’t need to replace them as often as traditional bulbs. LED light bulbs can last for years, contributing to overall cost savings over time. Moreover, their energy efficiency ensures that they consume less power, resulting in reduced electricity bills and a smaller environmental footprint.
In conclusion, upgrading your recessed lighting to LED options offers a host of benefits. From energy efficiency and longer lifespan to the flexibility in creating the perfect atmosphere in your space, LED lighting is a wise choice for anyone looking to improve their home’s lighting system.
Conclusion
In conclusion, by following the guidelines provided in this article, anyone can safely and effectively change a light bulb in recessed lighting. The easy way to replace a light bulb in recessed lighting consists of understanding the different bulb types, gathering essential tools, and following step-by-step instructions to ensure a successful DIY recessed lighting bulb replacement.
This quick guide to changing a light bulb in recessed lighting also informs you on how to troubleshoot common problems that may arise during the process, such as dealing with stuck bulbs, power issues, and incompatible bulb sizes. By taking your time and focusing on safety, you can tackle this task with confidence and minimal complications.
Furthermore, this guide encourages homeowners to consider LED options when replacing their recessed lighting bulbs. LED lighting not only enhances the functionality and aesthetics of a living space but also offers energy-efficient, long-lasting illumination that demands less frequent changes. With these tips and insights, you can boost your home’s lighting, save on energy costs, and improve the overall ambiance in your living spaces.
FAQ
What tools and materials do I need for replacing a light bulb in recessed lighting?
You will need a compatible replacement bulb, a sturdy ladder, a screwdriver for potential trim removal, and optionally, gloves and safety glasses for protection.
What safety measures should I take before replacing a light bulb in recessed lighting?
Turn off the power at the circuit breaker, allow heated bulbs to cool, wear protective gear, and optionally check for voltage with a tester to ensure the power is genuinely off before attempting replacement.
How do I remove a twist-lock bulb in recessed lighting?
Twist-lock bulbs can be unlocked by turning them counter-clockwise. Apply just enough pressure to release the bulb safely without causing damage to the socket or the bulb.
How do I change a light bulb held in place by spring clips?
Gently squeeze the spring clips and pull the bulb downward. To install a new bulb, spread the spring clips to secure the bulb firmly within the housing.
How do I deal with stuck bulbs when replacing them in recessed lighting?
You can use a range of techniques, including specialized tools like needle-nose pliers or a suction cup tool, for grip and safe removal.
What are the benefits of switching to LED bulbs in recessed lighting?
LED lighting offers energy efficiency, a longer lifespan, and the potential for a wider range of lighting temperatures and colors, enhancing the overall ambiance of a space.
How do I choose the right LED bulb for my recessed fixtures?
Consider compatibility with the housing, desired brightness (lumen output), color temperature for ambiance, and energy consumption to ensure efficiency.

