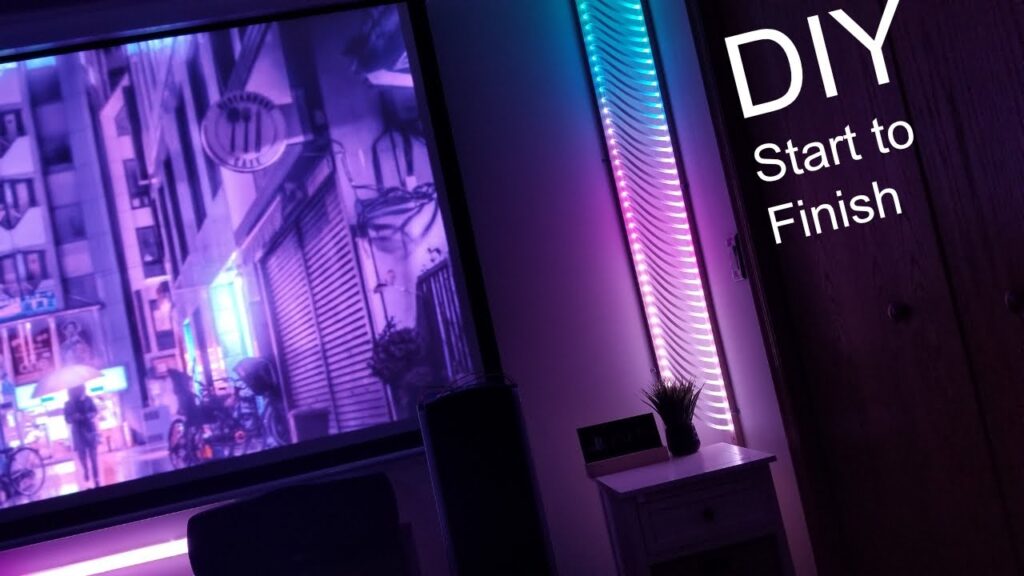
Allow me to introduce myself as the fearless handyman helming this wild journey into the world of DIY lighting. They call me the Keeper of WS2812b Strip Lights and the Grand Master of 1x2x6 visual wizardry. Buckle up as I unabashedly transform a simple piece of wood into a luminous beacon of creativity – dubbed our “Crazy DIY Light!”
I’ll take you, step-by-step, through the process of marking and drilling the perfect holes for our LED placements, taping down our LED strip with an accuracy bordering on obsession, and diving into the world of LED stip control with an ESP8266 module! Want to know how to use PEX tubing as diffusers, or arrange them in various dapper designs? Or perhaps the wild world of two identically performing led strips wired in parallels sounds intriguing? Fear not, I’ve got it all covered in this complete walkthrough.
Crazy DIY Light – Complete Walkthrough
Alright, it’s about to get lit in here! Well… literally. We’re going to embark on a Crazy DIY Light project together. Buff up your DIY skills and be prepared for a few laughs and light bulb moments along the way.
Materials Needed
First things first – we need some materials. Nothing too outlandish, just your typical DIY stuff really. We need a 1x2x6 long piece of wood, which will be the canvas for our masterpiece. Then we need WS2812b strip lights with 30 LEDs per meter, a 3/8 inch forstner bit, a 1/2 inch dado bit, the WLED software installed on an ESP8266 module, some pliable PEX tubing, handy-dandy L-shaped brackets, the ever-useful tape, and good old screws. Got all that? Fabulous!

This image is property of i.ytimg.com.
Step 1: Marking the Wood
Getting down to business, the first step is marking the wood. Locate the center of the wood – or where you think the center is, we’re not going to split hairs over a millimeter or two. Grab your tools and draw a straight line down the center, this will be the start of our LED highway.
Step 2: Drilling Holes for LEDs
Next up, we’re going to drill holes for the LEDs using our 3/8 inch forstner bit. Remember those little dots we marked along the center line? That’s where we’ll drill, just as if we were playing Dot-to-Dot. Isn’t adulthood fun?

This image is property of images.pexels.com.
Step 3: Cutting the Channel
Now we’re going to cut a channel along the center line using our 1/2 inch dado bit. This isn’t the time for a spot of channel surfing – the channel needs to be shallow enough for the LED strip to nestle into.
Step 4: Attaching the LED Strip
Let’s bring some light into our lives! Time to attach the WS2812b strip lights onto the wood, but be gentle, it needs to lie flat along the center line. Show some good ol’ DIY tender love and care.

This image is property of images.pexels.com.
Step 5: Installing WLED
We’re halfway there! For our next step, it’s time to install the WLED software onto the ESP8266 module. Don’t worry, it’s easier than trying to pronounce ESP8266 – just follow the instructions for setup and configuration like it’s a DIY recipe.
Step 6: Wiring the LED Strips
Now we get to play electrician. Wire up two LED strips in parallel. They need to perform identically like synchronized swimmers. Ensure they do, or we’ll have ourselves an LED light dance-off instead of a uniform glow!

This image is property of images.pexels.com.
Step 7: Adding the PEX Tubing
The next step requires some cutting skills as well as an arts and crafts mindset. Cut the PEX tubing into suitable sizes and fit it outside the LEDs. Like a diffuser, it’ll soften the light and make it glow like an Instagram filter, only real.
Step 8: Arranging the PEX Tubings
This is where the creative part kicks in. The tubing, once cut, can be arranged in a myriad of ways to form different unique designs. It’s all up to you, Picasso, so let your creativity run wild!

Step 9: Mounting the Light Fixture
Finally, we’ve reached the Mount Everest of our DIY journey. Using our trusty L-shaped brackets, it’s time to mount the light fixture up like a DIY victory flag. Place it so that it hits the right spots and illuminates your space like never before.
Conclusion
Congratulations, DIY champion! You’ve successfully created a crazy DIY light. Take a pause to revel in your accomplishment and laugh at the simplicity of it all. Not so crazy after all, right? The brightness in your space rivals the brightness of your triumph, thanks to your DIY efforts. So, ready for the next project? Or should I say, ready to get lit again?
😜💡 CRAZY DIY LIGHT COMPLETE WALKTHROUGH Begins Here: https://amzn.to/46FNrz8 (More Info Below👇🏼)
💻Electronics: https://amzn.to/4a0ZzO4
🎲Toys & Games: https://amzn.to/414se0D
🏋️ Sports and Outdoors: https://amzn.to/3QZh3lo
🍽️Home & Kitchen: https://amzn.to/47V3wSF
✅DAILY UPDATES!! BEST ONLINE DEALS HERE: https://amzn.to/45Ab1gf
LED Lights (Ws2812b): https://amzn.to/322KFJc
LED Lights (Ws2812B from AliExpress): https://s.click.aliexpress.com/e/_DnB…
Govee Lights: https://amzn.to/3ohuMGm
Esp 8266 Wifi Board: https://amzn.to/3FThzdS
Forstner Bit Set: https://amzn.to/33AMUnk
60 Amp Power Supply: https://amzn.to/3qHd93x
Wall plug for the power supply: https://amzn.to/3pNM27G
Pex Cutter: https://amzn.to/3KcP9hG
18 AWG Silicone Wire: https://amzn.to/32GfJP2
Wago Connectors: https://amzn.to/3qrZSg4
L Bracket: https://amzn.to/3ttS4MH
Pex Tubing (1/4 inch): https://www.menards.com/main/plumbing…
Wood: https://www.homedepot.com/p/1-in-x-2-…
Lego Technic Bugatti: https://amzn.to/3re31iS
Video for my WLED/esp8266 setup:
• How to install WLED on ESP8266 and co…
Some other complete how-to tutorials of mine:
DIY RGB Baseboard Trim: • DIY RGB BASEBOARD TRIM – START TO FIN…
Customizable Images creation: • DIY LED Lightbox – Full Walkthrough -…
LED Strip Diffuser Ideas: • DIY LED STRIP DIFFUSER IDEAS
Hexagon Project: • Making My Own Version of Nanoleaf Hex…
Corner Lighting Project: • Easy DIY Corner Lights – Full Walkthr…
Edge Lit Designs: • DIY LED Gaming Room Lights – Acrylic …
Govee Glide Project: • DIY GOVEE GLIDE / LIFX BEAM USING ONL…
Black Acrylic Floating Shelves: • DIY Nanoleaf – Black LED Acrylic
My Preferred Soldering Tools:
Soldering Iron: https://amzn.to/3s0kgmq
Solder: https://amzn.to/2ONlaVn
Solder Smoke Absorber: https://amzn.to/2ZpYaNS
Helping Hands: https://amzn.to/3jUe3FW
The best ways to support my work are to like, comment, subscribe, and share my videos as much as possible. Additionally, using my links to make purchases helps me earn a small commission at zero extra cost to you. Thanks for your support!

