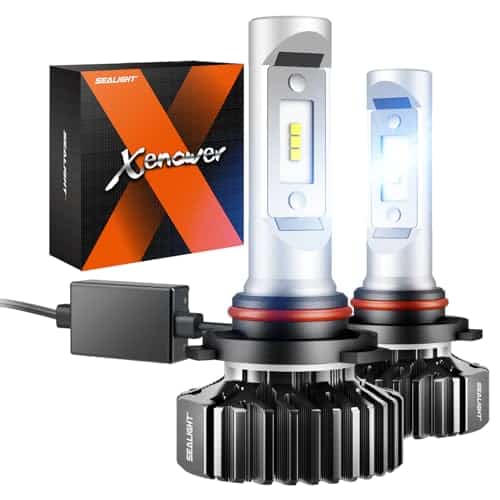
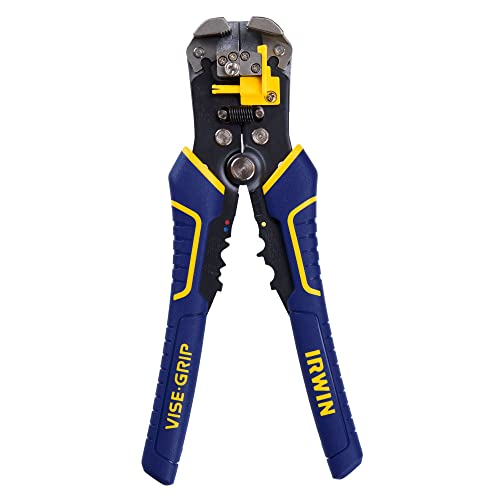
The step-by-step guide “How to wire the LED headlight conversion kit correctly” provides clear instructions on how to upgrade your vehicle’s headlights to LED. LED headlights are becoming more popular because they are brighter and more energy-efficient. By following these instructions, you’ll be able to wire the conversion kit correctly and enjoy improved visibility while driving.
Top-Rated LED Headlight Upgrades
Gather the necessary tools and materials
Before you embark on the installation process, it is crucial to gather all the necessary tools and materials. To start with, make sure you have a screwdriver on hand as it will be needed to remove certain components during the installation. Additionally, wire cutters are essential for trimming and preparing the wires before connecting them.
Another vital item to have is electrical tape, which will help secure and insulate the connections for added safety. Lastly, don’t forget to have the LED headlight conversion kit itself, as this is the main item you will be installing.
While these tools and materials are typically sufficient, it’s always recommended to refer to the manufacturer’s instructions for any additional tools that may be required. By ensuring you have everything you need before starting the installation, you can proceed with confidence and avoid any unnecessary delays or complications.
Prepare the vehicle
To safely work on your vehicle’s headlights, start by turning off the engine and parking the vehicle in a well-lit and flat area. This will provide you with the necessary visibility and stability to perform the task effectively. Once the vehicle is parked, open the hood by pulling the hood release lever located inside the car.
Next, locate the existing headlight bulbs. They are typically positioned behind a cover or protective casing. Depending on your vehicle, you may need to unscrew or unclip the cover to access the bulbs. For example, some vehicles may have a small plastic cover that can be easily removed by pressing a tab, while others may require unscrewing a few screws to take off the casing.
Once you have successfully removed the cover or protective casing, you will be able to see the headlight bulbs. These bulbs are usually held in place by a wire harness or socket. To remove the bulb, gently unplug the wire harness or socket from the back of the bulb.
Remember to handle the bulbs with care, avoiding direct contact with your skin. If you accidentally touch the bulb, it is advisable to clean it with a lint-free cloth and alcohol before proceeding.
By following these steps, you can ensure that you prepare your vehicle properly before working on its headlights. This will help you maintain safety and perform the task effectively.
Remove the old bulbs
To remove the old bulbs, start by carefully twisting them counterclockwise. Use a gentle but firm grip to avoid damaging any surrounding components or wiring. Once the bulb is loose, pull it out of the headlight housing. Take note to not exert too much force or you could risk breaking the bulb.
For a better understanding, imagine you are unscrewing a lid from a jar. Apply the same twisting motion, but be sure to exercise caution and maintain a steady grip. It’s important to keep in mind that the bulbs may be fragile, so handling them with care is crucial.
Remember, the goal is to remove the old bulbs without causing any additional damage. By following these simple steps and being mindful of the surrounding components, you’ll successfully remove the old bulbs from your headlight housing.
Connect the LED conversion kit
To connect the LED headlight bulbs from the conversion kit to the wiring harness, follow these simple steps:
- Start by removing the old headlight bulbs from your vehicle. This may involve accessing the headlight housing and releasing any clips or screws that hold the bulbs in place.
- Take the LED headlight bulbs from the conversion kit and examine them. Typically, you will notice that there are connectors or wires coming out from the base of the bulbs.
- Locate the wiring harness that came with the LED conversion kit. You may need to untangle or unbundle the wires if they are wrapped together.
- Match the connectors or wires on the LED bulbs with the corresponding connectors or wires on the wiring harness. Ensure that they are securely attached and aligned correctly.
- Depending on the specific instructions provided by the manufacturer, you may need to make certain wiring configurations. It is important to carefully follow any guidelines given in the manufacturer’s instructions to ensure correct installation.
By following these steps, you will successfully connect the LED headlight bulbs to the wiring harness, enhancing visibility and giving your vehicle a modern look.
Secure the connections
To secure the wiring connections after connecting the bulbs, follow these simple steps:
- Inspect the wiring: First, carefully examine the wiring connections to ensure they are properly aligned and fit snugly together. Look for any loose or exposed wires that may need attention.
- Choose your method: Decide whether you will use electrical tape or connectors to secure the connections. While both options are effective, connectors offer a more durable and long-lasting solution.
- Using electrical tape: If you opt for electrical tape, start by wrapping it tightly around the connected wires, covering any exposed areas. Make sure to extend the wrapping a couple of inches beyond the connection point for extra security. Continue wrapping until the connection is completely covered.
- Using connectors: For a more reliable option, connect the wires using appropriate connectors. Strip the insulation off the ends of each wire, and then insert them into the respective slots on the connector. Follow the manufacturer’s instructions for tightening the screws or securing the connector, ensuring a tight and secure connection.
- Test for stability: Once the connections are secured, gently tug on the wires to check for any movement. If the wiring remains firmly attached and doesn’t pull apart, you have successfully secured the connections.
By properly securing the wiring connections with electrical tape or connectors, you can prevent any potential hazards and ensure a safe and reliable electrical setup.
Test the headlights
To test the headlights after securing the connections, simply turn on the vehicle’s headlights and observe the LED bulbs. Ensure that they are functioning correctly and emitting the desired level of brightness. If you encounter any problems, I recommend double-checking the connections to ensure they are properly secured. Additionally, consult the manufacturer’s troubleshooting guide for further assistance in troubleshooting any issues that may arise. By following these steps, you can easily test the headlights and ensure that they are in optimal working condition.
Reassemble and finalize
To reassemble and finalize the installation of your LED headlights, follow these simple steps:
- First, make sure that the LED headlights are working properly. Turn on your vehicle’s headlights and check that both the high and low beams are functioning correctly. If needed, adjust the headlights for proper alignment.
- Once you have confirmed that the LED headlights are in good working order, begin reassembling any covers or protective casing that you removed earlier. Start by aligning the tabs or screws and gently pressing the cover into place. Make sure it fits snugly and securely.
- After reattaching all the covers and protective casing, carefully inspect the area to ensure that everything is securely in place. Double-check that all connections are tight and there are no loose parts.
- Finally, close the hood of your vehicle. Lower it gently, ensuring that it is fully closed and latched securely. Give it a light tug to verify that it is locked in place.
By following these steps, you can confidently reassemble and finalize the installation of your LED headlights. Enjoy the improved visibility and stylish look that your new headlights bring to your vehicle!
Final thoughts and recommendations
In conclusion, by following the steps outlined in this blog post, you have accomplished the task of correctly wiring the LED headlight conversion kit. Now, you can reap the benefits of improved visibility and a modern aesthetic for your vehicle. Enjoy the enhanced lighting experience and drive safely with confidence.
Essential Equipment and Supplies
Expert Advice
Step-by-Step Guide to Installing your LED Headlight Conversion Kit
- Familiarize yourself with the kit: Take a look at the components included in the kit, such as the LED bulbs, adapters, and any additional accessories. Read the instruction manual thoroughly to understand the installation process
- Prepare your vehicle: Make sure your vehicle is turned off and the headlights are switched off. Park in a safe and well-lit area to prevent any accidents. It’s always a good idea to disconnect the battery to avoid any electrical mishaps
- Remove the old bulbs: Depending on your vehicle model, you may need to access the headlight assembly from under the hood or behind the headlight assembly itself. Locate the existing bulb socket and carefully remove it. Some bulbs may require a small twist to unlock, while others may need to be gently pulled out
- Install the LED bulbs: Take your new LED bulbs and connect them to the wiring harness or adapter included in the kit. Ensure a secure connection and make sure the bulb is properly aligned with the headlight assembly. Then, insert the bulb into the socket and lock it in place if necessary
- Test and align: Carefully reconnect the battery and turn on your vehicle’s headlights to test the new LED bulbs. Make sure they are functioning properly and check if any adjustments are needed to align the beam pattern. If necessary, adjust the bulb’s position until you achieve a satisfactory result
- Remember, it is always recommended to consult the specific instructions provided with your LED Headlight Conversion Kit for accurate guidance tailored to your vehicle model


