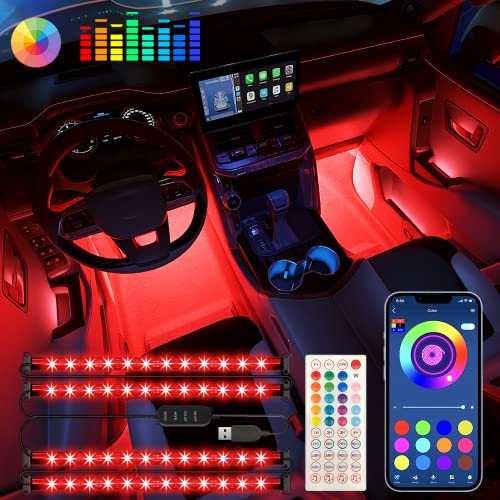
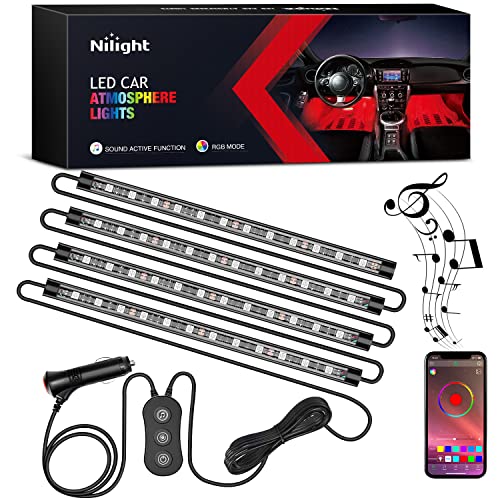
Hey there! I’m happy to give you a quick summary of our step-by-step guide on installing LED interior lights in your car. If you’ve ever wanted to add a touch of personalization and style to your vehicle, this guide is perfect for you!
First off, the purpose of this guide is to help you easily and efficiently install LED interior lights in your car. We understand that not everyone is familiar with automotive lighting installations, so we’re here to hold your hand through the process and make it as simple as possible.
Now, let’s get into the nitty-gritty of the guide. We’ve broken down the installation into easy-to-follow steps that will guide you through each stage of the process. From gathering the necessary tools to identifying the correct wiring connections, we’ve got you covered!
We’ve also made sure to include helpful tips and tricks to keep in mind along the way. Our goal is to make this experience smooth and enjoyable, so we want to provide you with all the knowledge you need to successfully complete the installation.
So, whether you’re a seasoned car enthusiast looking to add some extra flare to your ride or a newbie wanting to embark on your first automotive DIY project, our step-by-step guide on installing LED interior lights will give you the confidence and knowledge to accomplish your goal.
Remember, we’re here to help, so if you have any questions or run into any issues, feel free to reach out. Happy installing!
Brighten Up Your Ride
Installing LED Interior Lighting in Your Car or Truck: A Step-by-Step Guide | Headlight Revolution
Gather the necessary materials
Before you begin the installation process, make sure you have gathered all the necessary materials. Here is a list of what you’ll need:
- LED interior lights: These are the lights that you will be installing in your vehicle’s interior. Make sure you have the correct number of lights for the areas you want to illuminate.
- Wiring harness: This is a set of wires and connectors that will help you connect the LED lights to your vehicle’s electrical system. It is important to use a wiring harness specifically designed for your vehicle make and model.
- Wire connectors: These are small plastic connectors that will allow you to join the wires from the LED lights to the wiring harness. Make sure you have a variety of connectors in different sizes to accommodate different wire thicknesses.
- Electrical tape: This is used to insulate and protect the connections you make between the wires and connectors. It is essential for ensuring a secure and safe installation.
- Screwdriver: You will need a screwdriver to remove any panels or covers in your vehicle’s interior that may be blocking access to the installation areas. It’s good to have a set of different sizes to fit different types of screws.
Make sure you have all these materials ready and easily accessible before you begin the installation. This will help ensure a smooth and efficient process.
Prepare the car interior
To start preparing the car interior, make sure the ignition is turned off before proceeding. This ensures safety and prevents any accidental electrical issues. Next, open the car doors and locate the areas where you plan to install the LED lights. These areas could be the footwells, under the seats, or along the dashboard. For example, if you want to install the lights in the footwells, look for the areas where your feet usually rest while driving.
After you’ve identified the installation spots, it’s important to clean those areas thoroughly. Use a mild cleaning solution and a cloth or sponge to remove any dirt, dust, or debris. This step ensures that the adhesive backing of the LED lights will properly stick to the surface. For instance, if you find dirt or tiny particles in the footwell area, cleaning it will help the adhesive bond tightly to the carpet or floor mat. Good prep work will result in a clean and professional installation, providing the best outcome for your car’s interior transformation.
Mount the LED lights
To mount the LED lights in your car, start by using a screwdriver to carefully remove any existing fixtures or panels from the car interior. Take your time and make sure not to damage any surrounding parts. Once you have cleared the space, grab the LED lights and position them in the desired locations. This could be on the ceiling, under the dashboard, or anywhere else you want to add some stylish illumination.
Next, securely fasten the LED lights in place according to the manufacturer’s instructions. If adhesive is provided, remove the backing and press the lights firmly against the surface. Alternatively, if screws are needed, use the screwdriver to attach the lights using the provided holes. Ensure that the lights are securely attached so that they won’t come loose while driving.
Finally, test the lights to make sure they are functioning properly. Turn on your car and switch on the LED lights. If they are working as expected, you’re done! Enjoy the vibrant and customized lighting in your car as you cruise around town.
- Remove existing fixtures or panels using a screwdriver
- Position LED lights in desired locations
- Secure lights using adhesive or screws provided
- Test lights to ensure proper functionality
Wiring the lights
Connect the wiring harness to the LED lights by first identifying the positive and negative wires. Ensure that you align the positive wire with the positive terminal on the LED light, and the negative wire with the negative terminal. Once you have properly aligned the wires, use wire connectors to secure the connections. Insert the stripped end of each wire into the appropriate connector, and then firmly crimp the connector to clamp down on the wire, creating a secure connection.
After connecting the wires, it’s important to prevent any loose wiring that could cause issues later on. To do this, use electrical tape to wrap around the connectors, ensuring that all exposed wires are covered. Start by wrapping the tape tightly around the connection, and then continue wrapping it down the length of the wire for added security. This will help to protect the connection from moisture, dust, and other potential hazards. By following these simple steps, you can ensure that your LED lights are properly wired and securely connected.
Test and finalize the installation
To test and finalize the installation of the LED lights in your car, follow these steps:
- Turn on the car’s ignition: Make sure the car is in park or neutral, and start the engine. This will provide power to the electrical system of the vehicle.
- Test the LED lights: Once the car is running, activate the LED lights by switching them on using the control switch or button. Observe each light carefully to ensure they are functioning correctly. Check for any flickering, dimness, or malfunctioning lights.
- Adjust brightness or color settings (if necessary): If you are not satisfied with the brightness or color of the LED lights, consult the installation manual for instructions on adjusting these settings. Most LED lights have adjustable brightness levels or color options to suit personal preferences.
- Reattach fixtures and panels: If you had to remove any fixtures or panels during the installation process, now is the time to reattach them. Carefully align the components and secure them in place using the appropriate screws or clips. Take your time to ensure they are properly fixed to avoid any loose parts while driving.
- Tidy up the wiring: Organize the wiring for a neat and professional appearance. Use zip ties or wire loom to bundle the wires together and secure them to existing wire harnesses or vehicle structure. Ensure that the wiring is hidden from sight, especially if it runs along visible areas of the car’s interior.
Following these steps will help you test and finalize the installation of your LED lights, ensuring they are working properly and enhancing the appearance of your car in a clean and professional way.
Wrapping Up Your LED Installation
To sum it up, adding LED interior lights to your car is a simple and effective way to upgrade its overall look and create a one-of-a-kind lighting atmosphere. By following the detailed instructions provided in this blog post, you can confidently and safely embark on this DIY project. So go ahead, light up your car and enjoy the stunning results!
Tools and Materials
Brighten Your Ride
Step-by-Step Guide to Using Automotive LED Lighting
- Choose the right LED bulb: Research the specific lighting requirements for your vehicle, including the bulb size and compatibility. Look for LEDs that are designed specifically for automotive use, as they provide better durability and performance than non-automotive LEDs
- Ensure proper installation: Follow the instructions provided by the manufacturer to correctly install the LED bulbs in your vehicle. This typically involves disconnecting the battery and replacing the existing bulbs with the LED ones. Make sure to secure the bulbs tightly to prevent any vibrations while driving
- Understand the different types of LED lighting: Automotive LED lighting can serve various purposes, such as headlights, fog lights, and interior lights. Learn about the different types and their functions, so you can choose the appropriate LEDs depending on your needs and preferences
- Adjust the beam pattern: Properly aligning the headlights is crucial to ensure clear visibility without blinding other drivers. After installing LED headlights, it may be necessary to adjust the beam pattern to meet legal requirements. Some LEDs may come with adjustment screws to facilitate this process
- Regularly check and maintain: LED bulbs have a long lifespan, but it’s important to periodically inspect your automotive LED lighting to ensure it’s functioning correctly. Check for any damaged or flickering bulbs and replace them as necessary. Regular cleaning of the lenses can also improve the brightness of the lights
- Remember, it’s always a good idea to consult your vehicle’s manual or seek assistance from a professional if you are unsure about any aspect of using automotive LED lighting


![Interior Car LED Strip Lights with Wireless APP & Remote Control, LEDCARE RGB 2 In 1 Car Ambient Lighting Kit with 158 Inches Fiber Optic, Sound Active Function Car Neon Dash Lights [Upgraded Version]](https://m.media-amazon.com/images/I/61YjQqQb9PL._SS520_.jpg)


