If you’re looking for a modern and sleek lighting solution, then canless recessed lighting is a perfect choice. In this guide, I’ll show you how to wire canless recessed lighting, guiding you through a step-by-step recessed lighting installation. With these simple instructions, you can easily do DIY canless recessed lighting wiring. So, let’s dive in and transform the look of your space with these ultra-thin and efficient light fixtures!
Key Takeaways
- Canless recessed lighting provides a modern look and flexible installation options.
- Ensure the power is off at the breaker box before working with electricity.
- Plan the light placement and use a template to mark the openings for the lights.
- Follow the color-coordinated wiring diagram to connect the wires in the junction box.
- Proper wire management is crucial for a safe and effective installation.
- Adjustable light settings allow you to customize the color temperature according to your preferences.
- Test and enjoy the improved ambiance of your room after completing the installation process.
The Significance of Canless Recessed Lighting
In this canless recessed lighting installation tutorial, we will explore the benefits of canless recessed lighting and how modern lighting technology has revolutionized the way we illuminate our homes. Canless recessed lights are not only sleek and modern but also provide a range of advantages over traditional recessed fixtures.
Understanding Canless Recessed Lights Technology
Canless recessed lighting is known for its ultra-thin design, eliminating the need for bulky housing typically found in traditional recessed fixtures. This innovative technology offers greater flexibility in installation since lights can fit nearly anywhere due to their minimal thickness, often as slim as 1/8 inch. With adjustable light settings ranging from 2700K to 5000K, these lights accommodate various preferences and needs, making them a versatile and forward-thinking choice for home lighting design.
Benefits of Choosing Canless Over Traditional Recessed Lighting
Opting for canless recessed lighting over traditional recessed fixtures comes with multiple benefits:
- Easy installation: The thin design and absence of a traditional can housing allows for simpler, more flexible installation, even in tight spaces.
- Energy efficiency: Many canless recessed lights employ LED technology, consuming less energy while providing powerful illumination.
- Adjustable settings: With varying color temperatures and brightness levels, canless lights can be tailored to create the perfect ambiance for any room.
- Sleek, modern appearance: The minimalistic design of canless recessed lights offers a clean and contemporary look, complementing various interior styles.
Canless recessed lighting is an exceptional choice for those looking to upgrade their home with modern technology while reaping the benefits of easier installation and increased versatility. In the following sections, we’ll guide you through a step-by-step canless recessed lighting installation tutorial, helping you achieve the perfect lighting solution for your space.
Pre-Installation Preparation
Before embarking on your electrical wiring for canless recessed lighting project, it’s essential to lay proper groundwork and abide by necessary safety practices. This involves securing the right tools and materials, planning the lighting layout, and adhering to precautionary measures.
Tools and Materials Needed for Installation
In preparation for installation, gather the necessary tools and materials, which include:
- A drywall saw or Dremel Multi-Max tool for cutting the ceiling
- Wire strippers
- Connectors
- Safety equipment, such as safety glasses
Planning Your Lighting Layout
Proper planning of your lighting layout offers both aesthetic and functional benefits. To do this:
- Measure and mark the ceiling where each light will be installed
- Ensure an even distribution of light according to the room’s requirements
- Take into account any existing features, like vents or ceiling fans, to optimize placement

Safety Measures Before You Begin
Electrical safety is of utmost importance when dealing with canless recessed lighting installation. Never take shortcuts and always begin by turning off the power at the breaker box. This is a non-negotiable first step and helps prevent the risk of electrical shock during the installation process.
Turning Off the Power Safely
When embarking upon the exciting journey of wiring canless recessed lighting, it’s crucial to prioritize safety above all else. The first step in this recessed lighting wiring guide is to ensure the power supply is securely turned off. This preventative measure sets the foundation for the entire secure installation process, as it eliminates the risk of electrical shock and promotes electrical safety while working with wiring.
To successfully turn off the power supply, locate your home’s breaker box and identify the circuit that corresponds to the specific room where you will be installing the canless recessed lighting. Flip the switch in the breaker box to the “OFF” position, effectively cutting off all electrical currents to that specific area. Double-check the power status by trying to turn on an existing electrical appliance in the room, such as a floor lamp or ceiling fan, to ensure the power is indeed off.
https://www.youtube.com/watch?v=pc5HWB-tyng
With the power securely turned off, you can now proceed with confidence in tackling the remaining tasks involved in installing canless recessed lighting. Each step of the process should be followed with the same degree of caution and precision to maintain the integrity of your electrical system and uphold the proper safety standards. Enjoy the transformative effects of modern canless recessed lighting as you successfully navigate the installation process, all the while knowing that you’ve put your safety first.
Marking and Cutting the Ceiling
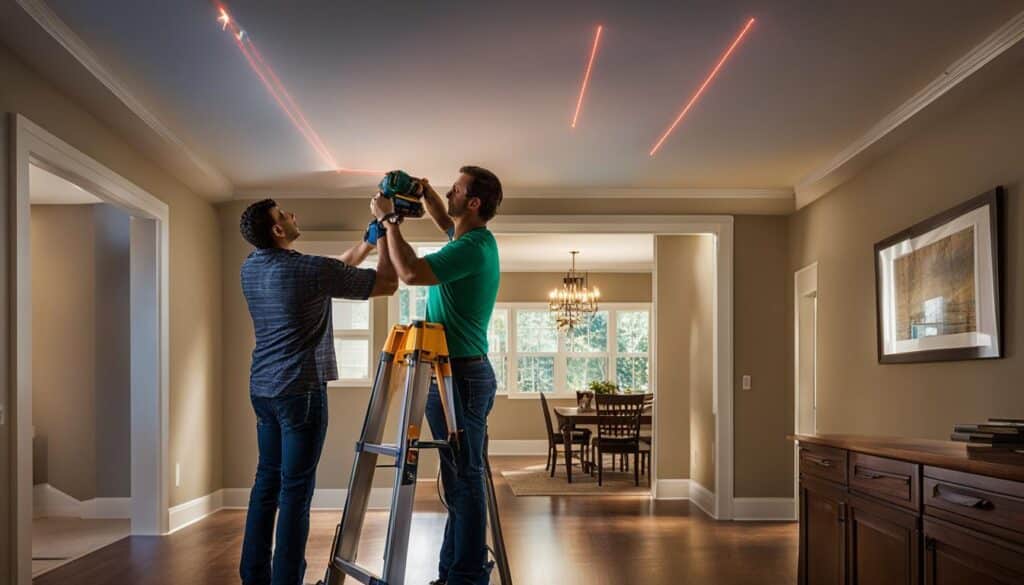
Once the power is off, marking and cutting the ceiling for light placement accurately is the next step in your step-by-step recessed lighting installation. This is where planning pays off as you ensure proper placement of multiple lights to achieve the desired lighting effect in the room.

Using the Template for Accurate Light Placement
To guarantee a precise outline for each light, it is crucial to use the provided template, which is typically made of paper or cardboard. This template will help to maintain uniformity and create a balanced lighting layout throughout the room. After marking the designated spots on the ceiling based on your layout plan, you can proceed with cutting the drywall.
Tips for Cutting Drywall With Precision
When it comes to cutting drywall, using the appropriate saw or a versatile tool like the Dremel Multi-Max (even without a drywall-specific blade) can achieve the desired cutouts for the lights. Follow these simple tips to ensure a smooth and precise drywall cutting process:
- Wear safety goggles to protect your eyes from dust particles.
- Hold the saw or the tool firmly with both hands to maintain control while cutting.
- Press lightly and let the tool do the work to avoid damaging the surrounding area.
- Cut the marked outline carefully, following the lines created with the template.
- Perform a test-fit with the light fixture to ensure the cutout size is accurate before proceeding to wiring.
By following these instructions, you’ll be well on your way to a professional-looking and efficient recessed lighting installation. The next sections will cover wiring and finalizing the installation, enhancing the aesthetics and functionality of your space.
Understanding the Wiring Diagram for Canless Recessed Lighting
In this section, we’ll delve into the essentials of wiring canless recessed lighting, such as decoding wire colors and preparing the junction box. Getting acquainted with the wiring diagram of canless recessed lights is crucial for a seamless and safe installation process.
Decoding Wire Colors and Their Functions
Wires in canless recessed lighting come in different colors, each representing its function. This color-coding system allows you to wire the lights properly and avoid any potential electrical hazards. We can decode the common wire colors as follows:
- Black: The power or “hot” wire, which carries the electrical current to the light.
- White: The neutral wire, serving as the return path for the electrical current.
- Green or Bare Copper: The ground wire, responsible for dispersing residual electricity in case of a short circuit or fault.
Paying close attention to these wire colors is essential for a safe and successful DIY canless recessed lighting installation.
Junction Box Knockout Hole Covers and Cable Connectors
Preparing the junction box is a crucial step in the wiring process. The junction box houses the electrical connections, keeping everything tidy and secure. In order to get a proper connection, couple of steps needs to be followed:
- Remove knockout hole covers: Each junction box comes with removable covers called “knockout hole covers.” Locate and remove these covers to create an opening for the cables.
- Insert cable connectors: Cable connectors are little devices designed to secure the electrical cables in the junction box. Once knockout hole covers are removed, install the appropriate cable connectors into the openings.
With the junction boxes prepared and the wire colors decoded, you’re now ready to proceed with wiring your canless recessed lighting. Following these guidelines and adhering to wiring standards will ensure a secure and hassle-free installation.
Step-by-Step Recessed Lighting Installation
Following our guide for recessed lighting installation, the process of installing canless recessed lights is streamlined and direct. The first steps you’ll need to complete are marking and cutting the ceiling, based on our canless recessed lighting wiring tips. Allow me to walk you through the process.
- Prepare the junction box. Remove knockout hole covers and insert cable connectors, making sure to secure them firmly.
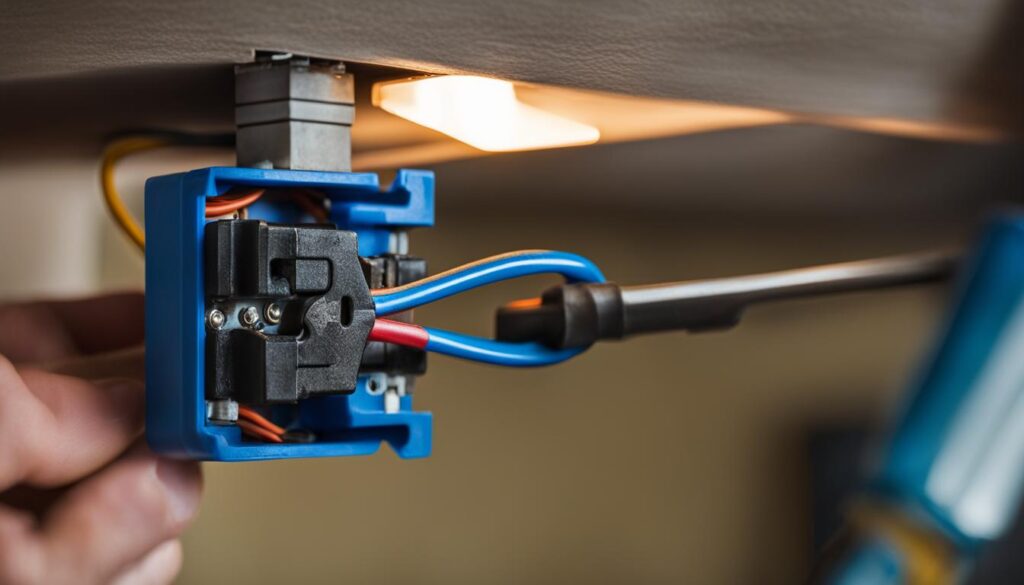
- Connect the wires according to their color codes (black to black, white to white, and green or bare copper to green) and secure the connections with appropriate connectors.
- Ensure a protected setup within the junction box by tucking the connected wires safely inside and securing the box cover.
- Attach the fixture itself to the ceiling by pushing the retention clips or springs into place, ensuring the light fits snugly within the cutout hole.
- Complete final wiring connections by connecting light to power source or daisy-chaining to additional lights in a series.
Following these steps, you’ll have successfully installed canless recessed lights in your home. You can adjust the number of lights and their placement based on the room requirements. Remember, always prioritize safety when working with electrical components, and seek help from a professional if needed.
Happy installing!
How to Wire Canless Recessed Lighting

Wiring canless recessed lights safely is crucial to ensure the safe and proper functioning of your lighting system. This step-by-step recessed lighting installation guide will help you through the process. Before you begin, make sure you have your canless recessed lighting ready, and the power is turned off at the breaker box.
The first step in the wiring process is to strip the ends of the electrical wires to expose the metal conductors. This is usually done using a good-quality wire stripper. Now, you will need to identify the correct wire colors and their corresponding connections:
Black wire: Power (hot)
White wire: Neutral
Green or bare copper wire: Ground
Many canless recessed light models come with a Quick Connect feature that simplifies the wiring process. With the Quick Connect method, you would simply insert the corresponding wire colors into the designated slots, ensuring a secure connection. To use the Quick Connect feature:
- Insert the black wire into the slot marked “hot.”
- Insert the white wire into the slot marked “neutral.”
- Insert the green or bare copper wire into the slot marked “ground.”
If your canless recessed light model does not have a Quick Connect feature, you can still wire the connections easily:
- Connect the black wires (power) together.
- Connect the white wires (neutral) together.
- Connect the green or bare copper wires (ground) together.
Tip:
Secure each wire connection with a small wire connector, also known as a wire nut. Make sure the connector is properly tightened to keep the wires securely fastened together.
After all the wires are connected, make sure there are no exposed metal conductors, and gently fold the wires into the junction box. Attach the junction box cover and make certain it is securely fastened. Your canless recessed lighting is now safely wired and ready for use.
Once the wiring is complete, you can proceed with the step-by-step recessed lighting installation instructions to secure your canless recessed light fixture into the ceiling.
Wiring Techniques for a Series of Canless Recessed Lights
When it comes to installing multiple canless recessed lights, utilizing effective wiring techniques is essential to ensure a safe and efficient setup. One common method is the daisy chain lighting configuration, which connects each light to the next using additional bits of electrical cable. To execute this method flawlessly and avoid hazards, proper cable management is crucial.
Wiring Lights in Daisy Chain Configuration
The daisy chain lighting configuration is a popular choice for wiring canless recessed lights in a series. This approach involves linking each light’s junction box to the next using electrical cables connected in series. To create a daisy chain setup, begin by connecting the corresponding colored cables of the first light to the corresponding colored cables in the second light. Continue this process for each subsequent light, maintaining the appropriate color-coding throughout the entire chain.
Tucking and Managing Wires Safely
Proper cable management is crucial when wiring multiple canless recessed lights using the daisy chain configuration. This not only ensures a neat appearance but also helps prevent electrical hazards. After making all the necessary connections, carefully tuck the connected wires into the junction boxes before securing them closed. Avoid pinching or bending cables excessively, as this may lead to issues in the future. By following these wiring techniques for canless recessed lighting, you’ll achieve a safe and visually pleasing installation.
Closing Up After Wiring: The Junction Box
After successfully connecting all the wires, one final step remains: closing up the junction box. This important step is essential to ensure a secure recessed lighting installation and safeguard your electrical connections. To finalize your work, follow these canless recessed lighting wiring tips:
- Make certain that the wires are not pinched or excessively bent.
- Neatly tuck all the wires within the junction box.
- Seal the junction box firmly; this prevents any potential disconnections or electrical hazards.

By meticulously completing these steps, you protect the circuit for your new canless recessed lighting and prepare it for seamless integration into your ceiling. With a firmly-closed junction box, you have peace of mind knowing your installation is safe from potential issues.
Now, as you step back and admire your handiwork, you can take pride in the fact that you did it yourself. The sleek, modern look of your new canless recessed lighting is sure to enhance your space while providing you with efficient, adjustable illumination.
Finalizing Your Canless Recessed Lighting Installation
After successfully installing your canless recessed lighting and ensuring your junction box is properly set up, one last crucial task remains: finalizing your installation. This includes setting the preferred lighting options and testing the system’s functionality for a complete and successful installation.

The Beauty of Toggle Switch Settings in Adjustable Lighting
One of the key advantages of canless recessed lighting is the adjustable lighting options available to you. The toggle switches found on the junction box allow you to set the desired color temperature for the lights in your room. It is important to set this preference before sealing the box to avoid the need to make adjustments later, which can be time-consuming and challenging.
Testing for Functionality and Light Quality
To ensure the success of your canless recessed lighting installation, it is essential to test the functionality and quality of the lights. Begin by restoring power to the room and operating the switches accordingly. Observe the light quality and brightness to verify that your lighting system works efficiently. It is beneficial to dedicate time to checking each light fixture, ensuring that all connections have been made correctly and the desired lighting options are functional.
Finalizing your canless recessed lighting installation is the last and essential step in creating a safe, efficient, and aesthetically pleasing lighting solution for your space. By carefully setting the adjustable lighting options and thoroughly testing functionality, you can take pride and confidence in your DIY project’s successful outcome.
Canless Recessed Lighting Installation Tutorial: Personal Experience
Reflecting on my personal DIY experience, I found that canless recessed lighting installation is surprisingly simple and efficient. The ultra-thin design of these lights makes the process straightforward and hassle-free. Given the ability to daisy-chain multiple lights together, canless recessed lights have become my preferred choice over traditional can lighting.
In this step-by-step guide, I would like to share my insights and tips to help you achieve a successful installation without much difficulty.

- Ensure the power supply is turned off by shutting down the appropriate circuit at the breaker box.
- Measure and mark the ceiling for light placement, using the provided template as a guide to easily draw outlines for the openings.
- Using the drywall saw, carefully cut the holes and test-fit each light to make sure the size is correct.
- Prepare the junction box by removing knockout hole covers and inserting cable connectors.
- Connect the color-coded wires according to their respective functions: black for power (hot), white for neutral, and green or bare copper for ground.
- For a series of lights, connect them in a daisy chain configuration and manage the wires neatly inside their junction boxes.
In my experience, following these steps led to a sense of accomplishment and satisfaction with the final result. The modern, sleek appearance of canless recessed lights truly transformed the look of my room. I hope this personal account helps you achieve a similar outcome and inspires you to take on this rewarding DIY project.
Conclusion
Wiring canless recessed lighting is a manageable DIY task that helps achieve a professional and elegant end result. The process consists of several key steps, such as ensuring the power is off, planning the layout, comprehending wiring diagrams, connecting wires carefully, and installing the lights successfully. As I reflect on my own DIY experience, I believe others can confidently undertake this process as well.
Reflecting on the DIY Process and End Results
The DIY outcome of wiring canless recessed lights safely demonstrates the importance of following step-by-step instructions and adhering to safety standards. This meticulous approach guarantees a stylishly-lit space that meets both functional and aesthetic requirements. The sleek appearance of canless recessed lighting provides a transformative look in any room, further validating its use as a modern lighting choice.
Next Steps After Wiring Your Recessed Lighting
With successful installation, the next steps could involve adjusting lighting schemes, incorporating smart home features, or simply enjoying the updated ambiance in your refreshed space. As the canless recessed lighting trend continues to grow, homeowners will undoubtedly appreciate this modern, resourceful lighting option that gracefully meets various needs and preferences.
FAQ
What are the benefits of choosing canless recessed lighting over traditional recessed lighting?
Canless recessed lighting offers a sleeker design, ultra-thin profile, easier installation, and adjustable light settings. It is more versatile than traditional recessed lighting as it can fit almost anywhere due to its minimal thickness and eliminates the need for bulky housing.
What tools and materials are needed for canless recessed lighting installation?
You will need a drywall saw or Dremel Multi-Max tool, wire strippers, connectors, safety glasses, a template for marking the ceiling, and the canless recessed light fixtures themselves.
How do I safely turn off the power for the canless recessed lighting installation?
Start by locating your breaker box and switch off the circuit that controls the area where you will be installing the lights. This will eliminate the risk of electrical shock during the installation process.
How should I use the template to mark and cut the ceiling for canless recessed lights?
Place the provided template where you want the light to be installed and either trace or draw around it. Use an appropriate saw or tool to cut along the marked line. Test fit the light fixture to ensure the size is accurate before proceeding to wiring.
What does the wiring diagram for canless recessed lighting look like?
Wiring diagrams include color-coded wires: black for power (hot), white for neutral, and green or bare copper for ground. They provide guidance on how to safely connect wires in the junction box and prepare it for a secure connection.
How do I wire a series of canless recessed lights together?
Use a daisy-chain configuration to link each light to the next using additional electrical cables. Connect the cables in series through their respective junction boxes and ensure proper cable management, safely tucking the connected wires into the boxes and securing them closed.
How do I adjust the light settings on canless recessed lights?
Some canless recessed lights offer adjustable lighting options. If available, set the desired color temperature using toggle switches on the junction box before sealing it. Adjustments post-installation may be more cumbersome, so configure the settings before the final installation step.

