Replacing recessed lighting, often referred to as canned lighting, is a practical DIY recessed lighting replacement project that enhances your home’s ambiance. It involves a few simple steps that can easily be executed with basic tools. Whether due to a burned-out bulb or for an upgrade, the transformation is both possible and rewarding. In this guide, I’ll show you how to carry out this straightforward task effectively, ensuring safety and efficiency. We’ll look at choosing the correct bulb, taking safety precautions, and proper installation so you can enjoy the full strength of your lights once more.
Key Takeaways
- Replacing recessed lighting is a doable DIY home lighting upgrade project requiring basic tools.
- Getting the right bulb for your recessed lighting is essential for fit and function.
- Always prioritize safety when working with electrical fixtures, including cutting power and using a sturdy ladder.
- Follow a step-by-step process for removing old recessed bulbs and installing new ones.
- Consider upgrading to Smart LED recessed lighting for increased energy efficiency and functionality.
- Weigh the cost of DIY vs. hiring a professional for recessed lighting replacement.
Understanding Recessed Lighting: A Primer
Recessed lighting fixtures, apt for various décor styles, are a commonplace yet stylish lighting solution in many homes. Known interchangeably as canned lighting, recessed lighting typically allows for straightforward bulb replacements, fostering an unobtrusive appeal fitting to most spaces. Familiarize yourself with the differences and compatibility of bulb types, sizes such as BR30 and BR40, and fixture mechanisms—some involve clips or twist-locks for securing the bulb.
Recessed lighting, also known as canned lighting, is a popular lighting solution with an unobtrusive appeal suitable for a variety of décors.
Understanding recessed lights is essential for successful recessed lighting replacement. Knowing the types of recessed lighting and their intricacies is the key to creating a comfortable and well-lit home environment.
There are several types of recessed lighting, which cater to different needs and preferences. Some popular ones include:
- Standard recessed cans
- Gimbal recessed lights
- Shallow recessed cans
- Square recessed lights
When selecting a recessed lighting replacement, consider the size of the recessed can. Commonly, a 4” diameter can typically uses a BR30 bulb, while a 6” diameter can work best with a BR40 size. This sizing will help ensure a proper fit and prevent issues with compatibility.
Another element to consider when understanding recessed lights is the fixture mechanism used to secure the bulb. This can vary between clips or twist-locks, which will affect how the bulb is installed and removed. Being aware of these differences will make the replacement process smoother and more efficient.
| Bulb Type | Typical Can Size | Fixture Mechanism |
|---|---|---|
| BR30 | 4 inches | Clips or Twist-locks |
| BR40 | 6 inches | Clips or Twist-locks |
Investing time in understanding recessed lights and their features will pay off with a successful recessed lighting replacement and a beautifully illuminated space.
Tool Time: Gathering What You Need for the Job
Equipping yourself with the right tools and materials before starting the project will make the task of replacing your recessed lighting bulbs more convenient and efficient. Let’s go through the essential items you will need to have at hand.

Choosing the Right Replacement Bulb
Selecting the correct replacement bulb is critical for both fit and function in your recessed lighting. Bulbs must be compatible with the fixture, matching both the wattage and type of the original. The size of the recessed can dictates the bulb size—for example, a 4” diameter can typically use a BR30 bulb, while a 6” diameter can is best paired with BR40 sizes.
Moreover, it’s essential to take note of the type of base connection. For instance, you might need a standard screw base (E26) or a GU10 pin base for your particular fixture. Considering these factors ensures a proper fit and compatibility with your existing recessed lighting setup.
Sturdy Ladder or Step Stool Preparation
As you will be working at height, it’s crucial to ensure you have a sturdy ladder or step stool. The stability of the ladder or stool is paramount to prevent falls and injuries while reaching the lighting fixtures overhead. Make sure it’s positioned on a level surface, and check the weight limit to support you and your tools.
Safety should always be a top priority when preparing to work on any home improvement tasks, particularly those involving heights.
Now that you have the essential tools and materials ready, it’s time to start working on replacing the recessed lighting bulbs in your home safely and efficiently. Remember to adhere to appropriate safety measures, and soon you’ll be enjoying a well-illuminated home atmosphere.
Safety First: Pre-Installation Procedures
Before jumping into the actual process of replacing your recessed lighting, it’s imperative to prioritize safety. Electrical work can pose serious risks if not handled carefully, so let’s review the essential steps to ensure a safe and successful project.
Powering Down: How to Cut Electricity Safely
Turn off the power at the circuit breaker or fuse panel before changing any lighting fixture to prevent electrical accidents. The correct switch or circuit responsible for powering your recessed lighting must be switched off. Don’t rely on just turning off the light switch, as this doesn’t guarantee that the full power is cut to the fixture. For an added layer of protection, it’s recommended to use a voltage tester to verify the absence of an electrical current, although this is not required.
The Cool Down: Waiting for Bulbs to Chill Out
If your recessed bulbs have been on recently, it’s crucial to give them time to cool down to avoid the risk of burns. Handling hot bulbs can cause injury, so waiting for them to reach a safe temperature is a necessary step. While cooling down the bulbs, take the time to gather your protective gloves and safety glasses to shield yourself against potential hazards like sharp edges and hot surfaces. Personal protection gear is an essential part of any electrical work safety process.
Remember: Safety should always come first when working on home electrical projects. By powering down, cooling the bulbs, and donning protective gear, you’ll create a secure environment to replace your recessed lighting.
Now that you’ve taken the proper safety precautions, you’re ready to move forward with confidence in replacing your old recessed lighting. In the next sections, we’ll provide step-by-step instructions on removing the old bulb and installing your new, energy-efficient lighting.
Step by Step: Removing the Old Recessed Bulb
Properly removing your old recessed bulb can be quite simple when approached step by step. First and foremost, always ensure the electricity is turned off and the bulb has cooled down. Now, let’s focus on removing the old bulbs from your recessed lighting fixture.
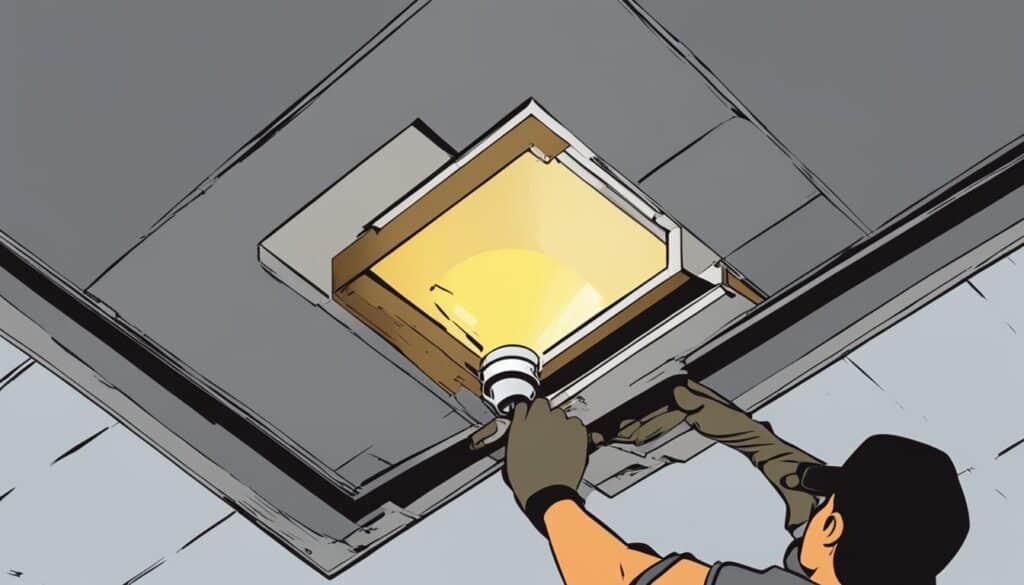
- Remove decorative trim: In some cases, there may be decorative trim around the fixture. Make sure to carefully detach it and set it aside in a safe place.
- Identify the type of fixture: Different fixtures have different mechanisms for holding the bulb in place. Some use recessed lighting clips, while others require a twist action. Inspect your fixture to determine what type of mechanism you are dealing with.
- Gently press clips or twist the bulb counterclockwise: Depending on your fixture, you’ll need to either gently press the clips inward to release the bulb or twist the bulb counterclockwise to disengage it from the fixture. In both cases, handle the bulb with care to avoid breaking it in the process.
- Maintain a firm grip on the bulb for removal: As you press the clips or twist the bulb, make sure you maintain a firm grip on the bulb itself. This will help prevent it from accidentally dropping and potentially causing injury or damage to your surroundings.
After following these steps, you should have successfully removed the old recessed bulb from its fixture. Now you’re ready to install a new bulb and enjoy your refreshed home lighting.
Installing Your New Recessed Lighting Bulb
Now that you’ve removed the old recessed bulb, it’s time to install the new one. The process for installing recessed lighting is pretty simple, but it’s essential to handle the light bulb carefully, ensuring you don’t overtighten it as that can damage both the bulb and the socket. For a successful step-by-step recessed lighting replacement, follow these outlined instructions:
- Prepare the new light bulb: Make sure that the replacement bulb is compatible with your existing fixture. It should be the same type and wattage as the original bulb.
- align the bulb with the socket: Before you insert the new bulb, ensure it’s correctly aligned with the socket.
- Use the appropriate method to install the bulb: Depending on the type of fixture and bulb, you may need to either push the bulb into position or secure it with a twist-lock mechanism.
When installing a twist-lock bulb, turn it clockwise until it’s snugly secured in the fixture, being careful not to overtighten it. For other types of bulbs that require pushing into position, gently apply pressure until the bulb is firmly in place. Remember that overtightening can cause damage to both the bulb and the socket and can lead to potential safety hazards. So, strive for a secure but gentle fit when installing your new bulb.
“Recessed lighting replacement doesn’t have to be a complex task. With the right guidance and careful handling, anyone can successfully install new light bulbs.”
In conclusion, replacing and securing new light bulbs in recessed lighting fixtures can be accomplished with ease by following the steps outlined above. Proper alignment and insertion are crucial factors in ensuring a successful installation. Armed with the right knowledge and precautions, you can readily upgrade your home’s recessed lighting fixtures and bask in their improved ambiance.
Smart LED Options: Upgrading Your Home Lighting
Upgrading to Smart LED recessed lighting can significantly enhance the energy efficiency and functionality of your home lighting system. These advanced options offer user-friendly features such as dimming and various light glows, allowing you to tailor your lighting ambiance to suit your mood and preferences.

In addition to their energy-saving properties, smart LED lights also enable seamless and convenient integration with home automation systems like Google Assistant, Amazon Alexa, or Siri. By doing so, you can easily control your lights via mobile apps or voice commands.
Exploring Recessed Lighting Conversion Kits
One way to upgrade your home to smart LED recessed lighting is by utilizing recessed lighting conversion kits. These kits contain all the necessary components for a smooth and straightforward installation process. What’s more, they also facilitate effortless connections to wireless networks for even greater convenience.
Upgrading your home with smart LED recessed lighting can result in significant energy savings and increased functionality.
Below, you’ll find a table illustrating the benefits of upgrading to smart LED recessed lighting, which highlights the features and advantages of this LED lighting upgrade.
| Benefit | Feature | Advantage |
|---|---|---|
| Energy Efficiency | LED Technology | Longer-lasting and more energy-efficient bulbs. |
| Customization | Dimming and Light Glows | Flexibility to set and adjust your lighting preferences. |
| Wireless Integration | WiFi Compatibility | Voice control and remote access through mobile apps. |
| Easy Upgrade Path | Conversion Kits | Simple, hassle-free installation process. |
As you can see, upgrading to smart LED recessed lighting provides a host of benefits that can greatly transform your home’s overall ambiance and convenience. Whether you’re seeking to enhance aesthetics, save on energy costs, or simply make your life easier, a smart LED recessed lighting upgrade is a wise investment for any homeowner.
Professional vs. DIY Recessed Lighting Replacement
Deciding between DIY vs professional recessed lighting replacement hinges on your comfort level with the process and the availability of appropriate tools. While replacing recessed lighting might not be overly difficult, consulting a professional electrician can provide additional security for those less confident in undertaking electrical tasks. It’s worth noting that the method of replacement may vary slightly depending on the fixture and bulb type, emphasizing the importance of following manufacturer-specific instructions for optimal results.
For a better understanding of when to opt for a professional, consider the following tips for replacing recessed lighting:
- Assess your familiarity with electrical work and lighting installations.
- Research the specific type of recessed lighting fixture in your home.
- Ensure you have all the necessary tools and equipment.
- Follow safety precautions and turn off the power before beginning.
If you’re confident in your ability and have the required tools, DIY replacement may be an economical and satisfying option. However, certain situations might warrant calling a recessed lighting professional for replacement:
Complex lighting systems with multiple switches or dimmers
Older homes with outdated wiring
Inaccessible or difficult to reach fixtures
Significant home renovation projects involving electrical work
Understanding the pros and cons of each option is essential for making an informed decision. The table below highlights some key differentiators between DIY and professional recessed lighting replacement:
| DIY | Professional |
|---|---|
| Potential cost savings | Higher upfront costs |
| Hands-on experience and satisfaction | Convenience and time-saving |
| Possible risks and safety concerns | Expertise and safety assurance |
| Requires research and preparation | Seamless installation and manufacturer warranty |
Ultimately, the choice to replace your recessed lighting fixtures DIY or enlist the help of a professional comes down to your level of comfort, expertise, and willingness to invest in the project. To ensure the best outcome, it’s crucial to weigh your options and choose the solution that suits you and your home’s needs.
Cost Considerations: Is It Worth Replacing Recessed Lighting Yourself?
When it comes to the cost of replacing recessed lighting, homeowners need to weigh the benefits and drawbacks of the DIY route versus hiring a professional. Factors to consider include the time investment, tool acquisition, and potential energy savings. Let’s take a closer look at these aspects to determine if undertaking this project yourself is worth the effort and cost.
- Time Investment: Replacing recessed lighting can be time-consuming, particularly for those new to this type of home improvement project. However, those willing to invest the necessary time to learn and practice can save on labor costs.
- Tool Acquisition: If you already own the basic tools required for replacing recessed lighting, a DIY approach can save money. However, purchasing new tools can add to the overall DIY cost-saving efforts, reducing potential savings.
- Energy Savings: LED bulbs offer extended lifespans, with up to 50,000 hours of illumination. By reducing the need for frequent replacements, homeowners can gain significant energy efficiency benefits. This factor should be considered when assessing the overall cost of the project.
Comparing the professional recessed lighting replacement cost to the DIY approach requires careful consideration of these factors. The table below highlights the average costs associated with each option:
| Replacement Method | Average Cost per Fixture | Additional Factors to Consider |
|---|---|---|
| DIY Replacement | $20 – $50 | Tool acquisition, learning curve, potential mistakes |
| Professional Replacement | $65 – $90 | Labor cost, convenience, warranties, and expertise |
Ultimately, the decision to replace recessed lighting yourself or hire a professional will depend on personal preferences, skills, and budget constraints. Homeowners who feel confident in their abilities and prefer hands-on projects may find the DIY option appealing, while others may prefer the peace of mind that comes with hiring a professional.
Remember, saving money on replacement costs shouldn’t come at the expense of safety or proper installation. Always take the necessary precautions and follow manufacturer instructions to ensure a successful project.
Conclusion
In summary, undertaking a successful DIY recessed lighting replacement is not only achievable but can also lead to significant improvements in your home’s lighting quality and energy efficiency. The key to a successful project lies in adhering to safety protocols, selecting the appropriate tools and replacement bulbs, and considering upgrades such as conversion kits for an enhanced home lighting experience.
Upgrading your home lighting can have both aesthetic and functional benefits. By following the step-by-step replacement process as outlined in this article, you can ensure a smooth and safe transition to a more energy-efficient and visually appealing lighting solution. In turn, this can lead to cost savings as less energy is consumed and fewer replacements are required over time.
Ultimately, the decision to embark on a DIY recessed lighting replacement is a personal one, influenced by factors such as comfort level, available tools, and budget. Regardless of your choice, keep in mind the tips shared in this article to optimize your home’s lighting and ensure the best possible outcome for your project.
FAQ
What bulb sizes are best for different recessed lighting cans?
The size of the recessed can determines the bulb size—for example, a 4” diameter can typically uses a BR30 bulb, while a 6” diameter can is best paired with BR40 sizes.
How can I ensure safety while working with recessed lighting?
Make sure to turn off the power at the circuit breaker or fuse panel, use a sturdy ladder or step stool, and wear protective gear like gloves and safety glasses. Additionally, allow the bulbs to cool down if they were recently in use to avoid burns.
How do I remove and replace a recessed lighting bulb?
Depending on your fixture, you may need to gently press clips or turn the bulb counterclockwise for removal. To install the new bulb, align it with the socket and either push or twist it into place, being careful not to overtighten.
What are the advantages of upgrading to Smart LED recessed lighting?
Upgrading to Smart LED recessed lighting enhances energy efficiency and functionality, enabling options like dimming and various light glows. Using conversion kits, they can also be connected to wireless networks for control via mobile apps or voice commands with systems like Google Assistant, Amazon Alexa, or Siri.
Should I replace my recessed lighting by myself or hire a professional?
Deciding between DIY and professional replacement depends on your comfort level, availability of appropriate tools, and the specific fixture or bulb type. While not overly difficult, consulting a professional electrician can provide additional security if you’re less confident with the process.
Are there any cost benefits to replacing recessed lighting myself?
Weighing the cost of DIY replacement versus professional services involves considering the time investment, tool acquisition, and potential energy savings. LED bulbs can lead to fewer replacements and increased energy efficiency, resulting in savings on electric bills, especially when replacing multiple fixtures throughout the home.

