We often find ourselves in a position where customizing our space with lighting requires a personal touch. LED light strips are a fantastic solution, but they often need to be tailored to fit our unique spaces. If you’re looking to customize your lighting and wonder how to cut LED light strips, our DIY guide is here to help. Not only is it possible to alter LED strips, but with the right approach, you can ensure they illuminate your space just as you envisioned.
Before you start, it’s crucial to check that your LED light strips come with designated cut lines, usually marked by scissors logos, indicating safe areas for making adjustments. Remember to always disconnect the strip from any power source to avoid electrical hazards. With a careful snip along the marked line, you can customize the length of your LED light strips to enhance the ambiance of any room.
Key Takeaways
- Ensure your LED light strips have marked cut lines before attempting any customization.
- Always disconnect from the power source to safely cut LED light strips.
- Use scissors or a sharp cutting tool to trim along the indicated cut line precisely.
- Customize your lighting to perfectly fit and enhance your intended space.
- Maintain the functionality of your LED strip by cutting carefully and accurately.
Understanding LED Strip Flexibility and Customization
LED light strips are celebrated for their remarkable flexibility, which allows users to create custom lighting solutions to fit an array of spaces perfectly. Whether you’re illuminating a kitchen counter or crafting an intricate display, the ability to tailor the length of these strips by cutting LED light strips is a feature that opens up limitless creative possibilities.
However, not all LED light strips are designed to be cut. Before you grab your tools, it’s imperative that you consult the manufacturer’s guidelines. The pathway to a custom lighting setup is simple: look for the intervals plainly marked by cut lines or icons. These indicators are your green light for safe customization, guiding you to the spots where you can trim without damage.
Attention to detail is key when customizing your LED light strips. Not only should you be aware of where to cut, but also knowing the tools to use for cutting LED light strips is crucial for protecting the integrity and function of these lighting solutions.
When it comes to the actual cutting process, precise instruments are your best friends. Let’s consider the commonly recommended tools for this purpose:
- Sharp scissors for a quick and clean cut
- A utility knife for precision
- A pair of wire cutters for strips with thicker encasements
This selection of tools helps ensure that your LED light strips are cut accurately and without damage, keeping your personalized lighting in perfect working order.
| Tool | Recommended Use | Notes |
|---|---|---|
| Sharp scissors | Basic cuts on clear marks | Easy to handle, best for most LED light strips |
| Utility knife | Thick coatings or precision work | Requires steady hand but offers precision |
| Wire cutters | Non-standard strip designs | Ideal for tougher materials |
Our journey into the customization of LED light strips is not merely about aesthetics but also functionality. As we wield our chosen tools to modify these strips, we must always prioritize maintaining the integrity of each piece to ensure your illuminated spaces shine brightly and reliably.
In conclusion, while the flexibility of LED light strips represents an exciting opportunity for DIY enthusiasts and professionals alike, it’s a path that requires careful consideration and precise execution. As we forge ahead, we do so with the confidence that comes from understanding not just how to cut, but more importantly, how to cut correctly.
Identifying the Correct Cut Points on LED Strips
As we dive into the customization of LED light strips, it’s crucial to recognize the significance of precision in this process. Identifying the right spots to cut these strips can mean the difference between a well-lit space and a series of disconnected LEDs. Adherence to the recommended steps to cut LED light strips not only ensures a successful modification but also prolongs the life of your LED light fixtures.
Locating Scissors Logos and Cutting Lines
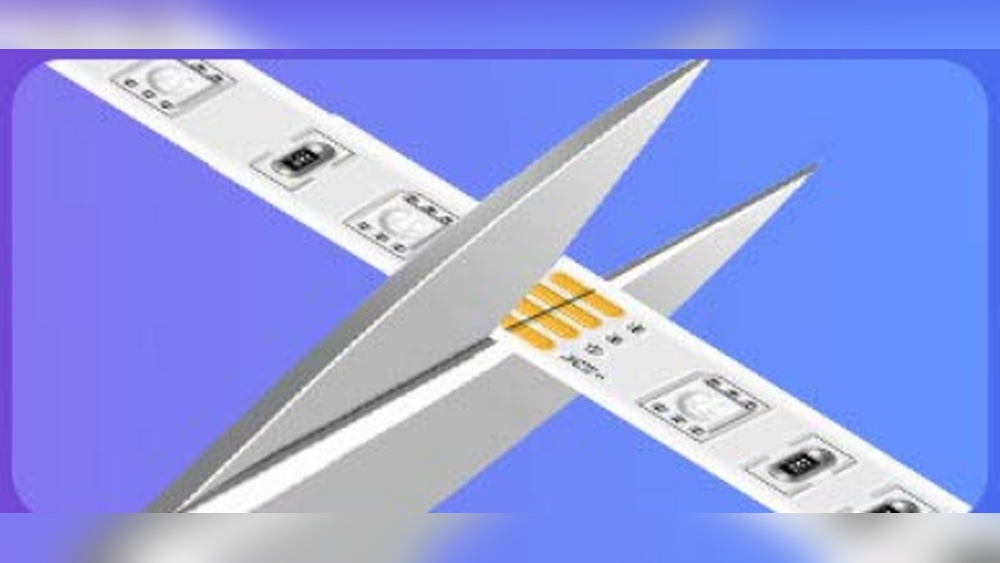
Every LED light strip is marked with specific signs that indicate where it’s safe to trim without hindering functionality. Look for the scissors logo or alternatively, cutting lines that are imprinted onto the strip itself. These markings represent the safe zones where the cutting technique for cutting LED light strips can be applied.

Meticulously following these guides is crucial – a stray cut outside of these boundaries could lead to a strip that’s irreparable and a project that’s back at square one. So take a moment to observe these indicators before making any modifications.
The Importance of Cutting on Copper Dots
Amid the LED strip, you will notice copper dots, which are essential to the electrical circuit of the LED. These copper dots need to be particularly respected when you’re cutting – it is a cardinal rule in the steps to cut LED light strips. The technique for cutting LED light strips entails slicing precisely through the middle of the copper dots, ensuring each segment maintains its circuit connection.
Adhering to these principles will enable you to tailor your LED light strips impeccably to fit any area, contributing to the functionality and aesthetics of your lighting project.
Essential Tools for Cutting LED Light Strips
Finding the safe way to cut LED light strips means having the right tools for cutting LED light strips at our disposal. For DIY enthusiasts and professionals alike, the objective is to achieve a clean, straight cut without damaging the delicate components of the light strip. Let’s explore the tools that will help us accomplish this with precision.
To start, a pair of sharp scissors is the most straightforward tool one can use. A utility knife also ranks high in effectiveness due to its ability to create exact cuts along the designated marks. Below is a list that details the essential tools needed for cutting LED light strips successfully:
- Sharp scissors or heavy-duty craft scissors
- Utility knife for precision in cutting
- 4-pin connectors for reattaching cut sections
- Soldering iron, if a more permanent connection is sought after
It’s important to note that having a steady hand and a focused eye are just as crucial as the tools themselves. When it comes to reconnecting the pieces, a 4-pin connector is indispensable, while a soldering iron may be used if solderable connections are preferred for a more secure attachment.
Prepare your workspace with ample lighting and a clean surface to ensure that every cut is as it should be. Lastly, remember to measure twice and cut once to avoid loss of materials and time due to errors. Accuracy is paramount in obtaining the perfect lighting setup for your space.
Pre-Cut Preparation: Safety and Accuracy Tips
The process of customizing LED strips to the perfect length begins long before the first cut is made. Our focus on safety and accuracy ensures that your lighting project starts on the right foot. Follow these guidelines to master the safe way to cut LED light strips and make use of the best tips for cutting LED light strips to tailor your lighting solutions like a pro.
- Always start by disconnecting your LED strips from any power source. This is non-negotiable when it comes to safe customizations.
- Measure twice, cut once. This old adage holds true in the world of LED light strips. Use a tape measure to determine the required length carefully.
- Mark your measured point clearly with a marker or a piece of tape. This serves as a visual aid, ensuring precision in your cut.
- Check the manufacturer’s guide to confirm the cuttable sections and avoid damaging segments that can’t be cut.
- Familiarize yourself with the strip’s structure. Locate the cut lines—often marked with scissors icons or dotted lines.
By adhering to these foundational tips, you not only maintain the integrity of your LED light strips but also uphold the highest safety standards. Remember, a successful cut is one that preserves the functionality of your LED strip while catering to your precise lighting needs.
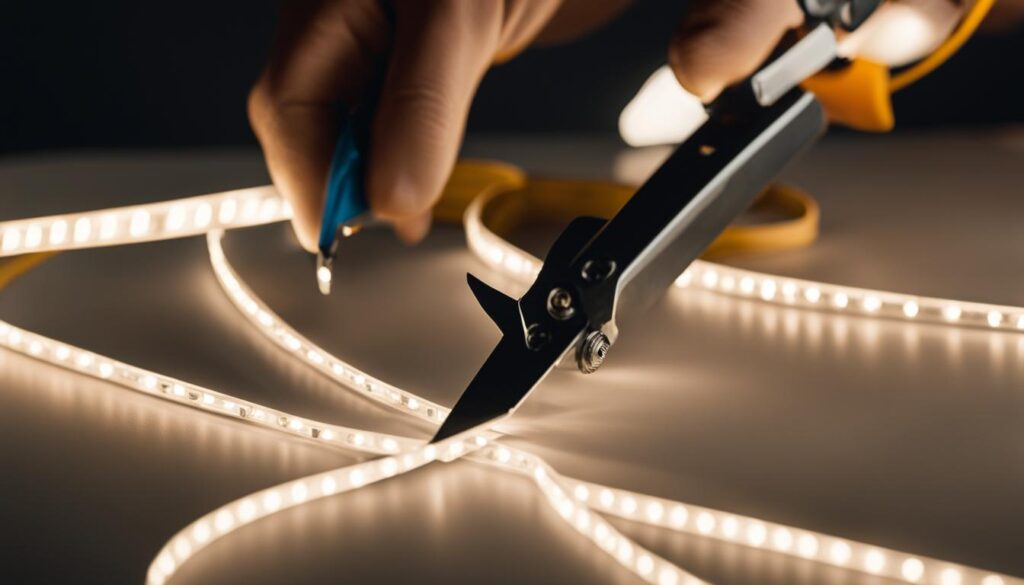
It is important to note that the quality of the cut can affect the overall outcome of your lighting. A neat and well-measured trim will ensure that your LED strip lights maintain their intended luminosity and offer the flexibility to fit various spaces seamlessly.
We at [Your Company Name] understand that lighting is not just about brightening a space—it’s about crafting the right ambiance. That’s why these preparatory steps are an integral part of achieving a custom and professional result. Do it right, and you’ll enjoy a safer, more efficient, and aesthetically pleasing LED installation.
How to Cut LED Light Strips
Customizing the length of LED light strips to fit specific areas of your home or office is a straightforward process that anyone can complete with the right technique and tools. We’re here to guide you through the steps to cut led light strips, ensuring you maintain the functionality and aesthetic of your LED lighting setup.
Step-by-Step Approach for Accurate Trimming
When it comes to how to cut led light strips, accuracy is key. Start by measuring the length you need using a ruler or a measuring tape. Most LED strips have designated cutting lines marked with a scissor logo, indicating where it’s safe to make your cut. Align your cutting tool directly above this mark and trim carefully to ensure a straight edge. This method preserves the circuitry for continued use.
Maintaining LED Strip Integrity While Cutting
Ensuring that each section of the LED strip continues to illuminate after cutting is essential. This calls for a precise technique for cutting led light strips: use sharp scissors or a proper utility knife and apply consistent pressure to make a clean cut. Avoid any twisting or bending of the strip at the cut point to safeguard the internal components.
Avoiding Common Cutting Mistakes
Common mistakes can easily be avoided if you’re diligent. Never cut outside of the designated cutting points marked on your LED strip. Always use sharp tools—as blunt ones may cause jagged edges and could damage the strip. Handle the strips with care; rough treatment could dislodge smaller internal pieces. Following manufacturer instructions is not just recommended; it’s a necessary step to protect your lighting investment.
Seamless Connections: What to Do Post-Cutting
After we’ve successfully demonstrated how to cut led light strips, the next step we face is reconnecting LED light strips for a flawless, continuous effect. This step is crucial in delivering the seamless illumination we all strive for. Here, we’ll explain how to handle and connect the pieces with precision to avoid any loss of functionality.

Connecting multiple cuts of LED strips may seem daunting at first, but with the right approach, it’s a straightforward process. The use of a 4-pin connector is often the easiest way to link two cut sections of strip lighting. By following these steps, we not only ensure a smooth connection but also the longevity and performance of our LED light strips.
| Step | Instruction | Tip |
|---|---|---|
| 1 | Align your 4-pin connector with the ends of the LED strips. | Check the polarity of your strips to match + and – with the connector. |
| 2 | Gently slide the LED strip into the connector clip. | Ensure that the copper pads are making firm contact with the connector pins. |
| 3 | Close the connector clip to secure the strip. | Do not apply excessive force, which might damage the connector or LED strip. |
| 4 | Repeat the process for the other side of the LED strip, if needed. | Inspect the connection visually to ensure everything is aligned properly. |
| 5 | Test the connection by powering on the LED strips. | If the lights do not turn on, double-check your connections and polarity. |
We understand the desire to maintain the beauty and integrity of LED displays, which is why it’s paramount to handle these connections with care. If any challenges arise during reconnecting LED light strips, do refer back to this guide as your resource for achieving those splendid, continuous lines of light.
Attaching and Securing Cut LED Strips for Optimal Performance
After meticulously cutting LED strips, we’ve reached the vital stage of attachment. By properly attaching LED strips, we ensure not only their optimal performance but also their longevity and safety. In our experience, most issues arise not from the quality of the strips but from the nuances of attaching them securely. Here’s our professional approach to this key phase.
Effective Use of Adhesive Backing
Integral to the installation of LED light strips is the use of the pre-applied adhesive backing. Commonly, these backings are from trusted brands like 3M, renowned for their strong adhesive properties. To make the best use of this feature, ensure the surface is clean, free of debris and completely dry. The installation area’s preparation is as important as the quality of the adhesive for cutting led light strips, as it translates directly to the strip’s performance.

Ensuring Firm Attachment on Surfaces
Ensuring that the cut LED strips are firmly secured to target surfaces is a non-negotiable step. Without it, you risk premature peeling, weakening of lighting effects, and potential hazards. Surfaces that are suitable for attaching LED strips may include under cabinets, along desk edges, or around entertainment centers—as long as they are non-porous and away from moisture exposure.
| Surface Type | Cleanliness Level | Suitability |
|---|---|---|
| Glossy Paint | Free from dust and oils | Highly Suitable |
| Wood | Must be varnished and dry | Suitable with caution |
| Metal | Should be rust-free | Highly Suitable |
| Textured Wall | Not recommended | Not Suitable |
As we proceed with the installment, bear in mind that correctly attaching LED strips is not just about beauty but also about function. When you hear the term adhesive for cutting led light strips, think beyond the words. Consider the environmental factors, the surface, and the overall setup that will serve you well into the future.
Rejoining LED Strips: Techniques and Connectors
When embarking on the task of reconnecting LED strips, it’s imperative to select the right LED strip connectors to ensure a reliable and safe electrical connection. Recognizing the importance of compatibility, we often recommend the use of Lepro 4-pin connectors. These connectors are versatile, supporting a variety of LED strip types and catering to different connection requirements, such as corner connections and straight-line extensions.

Choosing the Right Connectors for Your LED Strips
Choosing the ideal connector is akin to finding the perfect piece for a puzzle. The width of your LED strip must be matched by the width of the connector to create an efficient and sturdy link. Misalignment can lead to weak connections and even electrical failures, which is why the details matter. Let’s examine a comparison table that outlines the characteristics you should consider while purchasing connectors.
| Connector Type | Compatibility | Connection Style |
|---|---|---|
| Lepro 4-Pin Connector | 10mm RGB LED strips | Straight-line and corner |
| Solderless Clip-on Connector | 8mm single-color LED strips | Straight-line |
| T-Shaped Connector | 10mm RGB LED strips | T-connection for splitting |
| X-Shaped Connector | 10mm RGB LED strips | X-connection for multiple directions |
Safely Connecting Multiple Strips Post-Trimming
Ensuring safety when reconnecting LED strips cannot be overstated. Starting with a focus on polarity, we carefully match the red and black wires to the correct + and – terminals to avoid any mishaps. Utilizing quick-connectors aids in maintaining this polarity, providing a simple yet effective solution for multiple strip extensions. It’s about achieving a balance between ease-of-use and safe practice to ensure that the glow of your LED strips continues uninterrupted.
Your lighting project success hinges on the precision with which you reconnect each LED strip segment. As we guide you through selecting and using the right connectors, we strive to illuminate the pathway to seamless, bright, and consistent lighting in your space.
Testing Your LED Strips After Trimming
Once you’ve carefully trimmed your LED light strips to the desired length, it’s imperative to perform a thorough test to ensure functionality. This crucial step verifies that the modifications you’ve made haven’t compromised the strip’s operation. In this phase, we take the time to connect the strip to a power supply and look for the satisfying glow of success. Not only does testing LED strips confirm that the alterations were successful, but it also grants us peace of mind knowing that our efforts have yielded the expected results. A well-executed test after altering LED strips is fundamental, as it reveals any errors that may need correction.
How to Ensure Proper Functionality
Ensuring the functionality of cut LED strips involves meticulous attention to detail. After reconnection, power the strips to check that each section lights up uniformly without flickering or dead spots. In cases where the strip does not illuminate as it should, it’s essential that we assess whether we’ve matched the connectors accurately, with positive to positive and negative to negative alignments. This alignment is vital for the current to flow correctly and for the strip to function as intended.
Troubleshooting Common Post-Cut Issues
Even when we follow all the recommended steps, sometimes LED strips may present issues post-cutting. It’s not uncommon to encounter minor hiccups that can often be resolved through basic troubleshooting. Should any section of your LED strip fail to light up, first ensure that all wire connections are correctly matched and securely fastened. If continuity is present and issues persist, inspect the terminal wire connectors and reattachment points. Sometimes, a simple adjustment here can make all the difference. Remember, rigorous testing and troubleshooting are indispensable practices for maintaining the integrity and ensuring functionality of cut LED strips.
FAQ
Can LED light strips be cut to size?
Yes, many LED light strips can be cut to size. They are designed with specific cutting points marked by cut lines or scissors logos to indicate where trimming is safe.
What tools do I need to cut LED light strips?
To cut LED light strips, you’ll need sharp scissors or a utility knife to make straight cuts along the marked cut lines. For reconnecting strips, a 4-pin connector and possibly a soldering iron may be required.
How do I find the correct spot to cut my LED light strip?
Locate the scissor logos or cutting lines along the strip, which often appear near copper dots or pads. These indicate safe points to cut without damaging the functionality of the LEDs.
How can I ensure my LED light strips are cut safely and accurately?
First, disconnect your LED light strip from any power source. Use a ruler or measuring tape to find and mark the correct length, then cut at the indicated cut points with appropriate tools to ensure a clean cut.
What are some common mistakes to avoid when cutting LED strips?
Common mistakes include cutting at non-designated points, using dull tools that can damage the strip, and mishandling the strip during cutting. It’s crucial to follow the manufacturer’s guidelines and use proper cutting techniques.
What should I do with my LED light strips after cutting them?
After cutting, you may want to reconnect the strips using a 4-pin connector. Ensure the connection is secure and the polarities are aligned properly before applying power to test functionality.
How do I attach my cut LED strip to the intended surface?
Clean the surface thoroughly to make it free from dust and moisture. Then, remove the adhesive backing from the strip and press firmly along the intended path to secure the strip in place.
What types of connectors should I use when rejoining cut LED strips?
Select connectors that match the width and pin configuration of your LED strips. For instance, a universal Lepro 4-pin connector works well for various strips, accommodating both corner and straight-line extensions.
How do I connect multiple cut LED strips together safely?
Pay close attention to the polarity of the strips and wires when using connectors. Red and black wires should align with the respective + and – terminals to ensure proper function of the LED strips.
What should I do if my LED strip doesn’t work after cutting and reconnecting?
Verify that all wires are correctly matched and that connections are secure. You may need to use terminal wire connectors or readjust the installation for a secure setup. If issues persist, the cutting or connections may have been done improperly, and reevaluation of the process is required.






Anders
I never knew there were scissors logos on LED strips! Mind blown! 🤯