

Installing smart LED lights is a breeze with this step-by-step guide. In just 5 simple steps, you’ll have a more convenient and energy-efficient lighting setup for your home. Give your space a modern upgrade and enjoy the benefits of smart lighting.
Top Picks for Smart LED Lighting
[content-egg-block modules=AmazonNoApi template=offers_grid cols=3 groups=”SectionIntro”]
Gather the necessary tools and materials
Gather the necessary tools and materials before starting the installation process. Begin by ensuring you have all the required items at hand. First, get the smart LED lights that you’ll be using for your setup. Next, grab a screwdriver that matches the screws provided with the lights. This will be essential for securing the lights in place. Additionally, make sure you have wire cutters available to trim and adjust the wires as needed. Finally, check if there are any additional accessories or connectors mentioned in the instructions or included in the package, and have them ready as well. Having all these tools and materials prepared before you begin will ensure a smooth and efficient installation process.
[content-egg-block modules=AmazonNoApi template=offers_grid cols=3 groups=”Step1″]
Turn off the power
To ensure your safety while installing smart LED lights, it is crucial to turn off the power in the specific area you will be working in. Locate the circuit breaker or fuse box and switch off the power to the corresponding area. For example, if you are installing lights in your kitchen, find the circuit breaker or fuse labeled “kitchen” or “lights.” Flip the switch or remove the corresponding fuse to cut off the power supply to that area. By doing this, you eliminate the risk of electric shock or damage to the LED lights during the installation process.
Remove existing light fixtures
To remove any existing light fixtures in the area where you want to install your smart LED lights, follow these easy steps:
- Prepare your tools: Get a screwdriver with the appropriate size and type, depending on the screws holding your fixtures in place.
- Turn off the power: Always prioritize safety first! Before starting any work, switch off the power supply to the area where the fixtures are located. This can be done at the main circuit breaker or by turning off the specific light switch.
- Unscrew the fixtures: Locate the screws holding the fixtures in place, usually on the sides or bottom. Insert the screwdriver into the screw head and turn counterclockwise to loosen them. Once all screws are loose, gently pull the fixtures away from the ceiling or walls.
- Detach the fixtures: Some fixtures may be directly wired to the electrical wiring behind them. Carefully disconnect any electrical connections by unscrewing wire nuts or removing electrical tape. Remember to make note of which wires were connected for future reference.
- Remove mounting hardware: After detaching the fixtures, you may find mounting hardware still attached to the walls or ceiling. Use the screwdriver to remove any remaining screws or brackets, ensuring a clean surface for your smart LED lights.
- Double-check the power: Before proceeding with the installation of your new smart LED lights, confirm the power is still switched off at the main circuit breaker or light switch.
By following these clear and concise instructions, you’ll be able to remove any existing light fixtures from your desired area in preparation for installing your smart LED lights. Happy DIY-ing!
[content-egg-block modules=AmazonNoApi template=offers_grid cols=3 groups=”Step3″]
Connect the smart LED lights
To properly connect your smart LED lights, it is important to follow the instructions provided with the lights. Here’s a step-by-step guide on how to connect them:
- Start by carefully reading the instructions that came with your smart LED lights. Familiarize yourself with any specific requirements or recommendations mentioned by the manufacturer.
- Identify the necessary components for connecting the lights. This may include wires, connectors, or a wiring diagram. Make sure you have all the required materials ready before starting the installation.
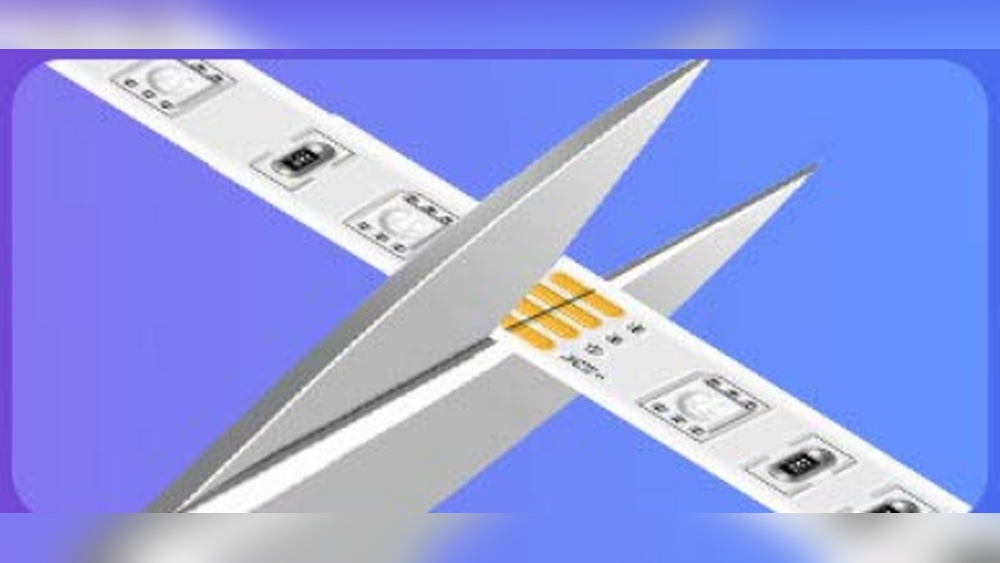
- If your smart LED lights require wiring, you will need to connect the wires correctly. Here’s an example: if your lights have positive and negative wires, match the positive wire from the lights to the positive wire of the power source, and similarly for the negative wires. Use wire connectors or electrical tape to create secure connections.
- In case your smart LED lights come with connectors, simply plug them together according to the provided instructions. This may involve aligning specific pins or connectors and gently pushing them together until they click into place.
- Some smart LED lights may require you to follow a wiring diagram. Study the diagram carefully and connect the wires accordingly. For instance, if the diagram specifies that the blue wire should be connected to the black wire, make sure to follow the color coding.
- Take your time during the installation process to ensure secure connections. Test the connections by gently tugging on the wires or connectors to see if they are firmly attached.
Remember, always prioritize safety when working with electronics. If you are unsure about any aspect of the installation process, consult a professional electrician to ensure proper and safe connectivity.
Test and adjust the lighting
To test and adjust the lighting after connecting smart LED lights, follow these simple steps:
- Turn on the power: Once the LED lights are properly connected, flip the power switch back on. This will supply electricity to the lights and allow you to test and make adjustments.
- Access the control panel or app: Open the designated app on your smartphone or tablet, or access the control panel on the wall. This will give you control over the settings of your smart LED lights.
- Test the lights: Use the app or control panel to turn on the lights and observe their performance. Check if all the lights are functioning properly and if they are illuminating the desired areas.
- Adjust brightness: If the lights appear too dim or too bright, adjust the brightness settings. Decrease the brightness if the light is overpowering, or increase it if the illumination is too weak. Aim for a comfortable and aesthetically pleasing level of brightness.
- Tweak color settings: If your smart LED lights offer different color options, experiment with them to find the one that suits your mood or environment. Some lights may even allow you to set custom colors or choose from pre-set options.
- Modify additional settings: Explore the app or control panel to see if there are any additional settings you can adjust. This may include features like timer settings, scheduling, or syncing with other smart devices.
By following these steps, you can effectively test and adjust the lighting of your smart LED lights, ensuring they meet your preferences and lighting requirements. Enjoy the flexibility and convenience of creating the perfect ambiance for any occasion!
Wrap it up
In conclusion, you’ve done it! You have accomplished the installation of your smart LED lights in just five simple steps. Now, sit back and revel in the convenience and energy efficiency that these lights will bring to your home. Well done, and may your new smart lighting system brighten up your space in more ways than one!
Essential supplies
[content-egg-block modules=AmazonNoApi template=offers_list groups=”Materials”]
Pro Tips for Setup
Getting Started with Smart LEDs: A Step-by-Step Guide
- Get the right smart LED: Before using smart LEDs, make sure you choose one that is compatible with your smart home system or device. There are various options available, such as Philips Hue, LIFX, and TP-Link, so research and choose the one that suits your needs
- Install and set up the smart LED: Follow the manufacturer’s instructions to install the smart LED light bulb or strip. It usually involves screwing in the bulb or attaching the strip to the desired location. Then, connect the smart LED to your home’s Wi-Fi network or hub according to the instructions provided
- Download the corresponding app: To control your smart LED, download the app provided by the manufacturer. These apps are usually available for both Android and iOS devices. Once downloaded, open the app and follow the on-screen instructions to connect the smart LED
- Explore the features: Smart LEDs usually offer various features, such as adjusting brightness, changing colors, creating schedules, and even syncing with music or movies. Take some time to explore the different functions available in the app and customize your lighting experience as desired
- Control your smart LED with voice assistants: If you have a voice assistant like Amazon Alexa or Google Assistant, connect it to your smart LED using the app. This allows you to control your lights using voice commands. Simply say something like “Hey Google, turn on the living room lights” or “Alexa, dim the bedroom lights” to enjoy hands-free control
- Remember, using smart LEDs is all about convenience and customization. Don’t hesitate to experiment and adapt the lighting to suit your mood and needs. Enjoy the possibilities and have fun experiencing the world of smart lighting!
Frequently Asked Questions about Smart LEDs
Are Smart LEDs compatible with smart home systems like Apple HomeKit or Samsung SmartThings?
Yes, Smart LEDs are compatible with smart home systems like Apple HomeKit and Samsung SmartThings. These systems support a wide range of smart devices, including Smart LEDs. By connecting your Smart LEDs to either Apple HomeKit or Samsung SmartThings, you can control and automate your lighting through their respective apps or using voice commands with virtual assistants like Siri or Bixby. Furthermore, integration with these smart home systems allows you to synchronize your Smart LEDs with other smart devices in your home, creating a cohesive and customizable smart home experience.
Can I schedule the Smart LEDs to turn on and off at specific times?
Yes, absolutely! You can definitely schedule your Smart LEDs to turn on and off at specific times. Most smart LED bulbs come with built-in features or you can use a smart home automation system to control them. By using a mobile app or a compatible hub, you can easily set up schedules that suit your preferences. Whether it’s turning on your lights in the morning to wake up naturally or automatically dimming them in the evening for a cozy atmosphere, scheduling your Smart LEDs adds convenience and customization to your lighting experience.


Blair
Great guide! I installed smart LED lights in my living room and they look amazing. The step-by-step instructions were easy to follow.