LED lighting has revolutionized interior and exterior illumination with its energy efficiency and design flexibility. In this simple guide, I’ll walk you through the steps to self-install LED strip lighting, transforming ordinary spaces into radiant and atmosphere-rich environments. Whether you’re a DIY enthusiast or new to light installations, this tutorial promises clarity and ease for a stunning lighting upgrade in your home.
By following this step-by-step LED lighting installation guide, you’ll learn how to easily install LED lighting on your own. From choosing the right LED strip to mastering surface preparation and power considerations, each section is filled with helpful tips and comprehensive information to ensure a successful DIY LED lighting installation.
Key Takeaways
- Selecting the appropriate LED strip for your project
- Preparing the surface for maximum adhesion
- Creating a well-thought-out lighting layout
- Properly calculating power requirements
- Applying the LED strips and connecting extensions
- Ensuring optimal placement and clean angles
- Customizing and controlling your LED lighting
Understanding LED Strips and Pre-Installation Tips
Before embarking on your easy LED lighting installation journey, it’s crucial to have a strong grasp of the different types of LED strips and gather some essential pre-installation tips. This knowledge will enable you to achieve a professional LED lighting installation. Let’s dive into these key aspects of setting up your LED lighting:
Choosing the Right LED Strip
As you search for the perfect LED strip for your project, consider the variety of options available. Brands like Govee and Phillips Hue offer customizable, Bluetooth-controlled, RGB lights that are perfect for syncing multiple strips. Music enthusiasts should look for Micomlan strips that pulse to melodies, while Corsair provides thicker, bolder lighting options. If ambiance without the extras is your goal, simple white LEDs offer a budget-friendly choice.
Gathering Required Tools
Before beginning your installation, ensure you have the necessary tools at hand. These include a measuring tape, a clean cloth, and a ladder if needed. By preparing your tools beforehand, you’ll save time and streamline the installation process.
Measuring Your Installation Area
Measure each installation area accurately to determine the length of the LED strip you’ll need. Use a measuring tape to establish the correct dimensions of your space, ensuring you have the precise amount of LED strip required for your project. Proper measurement will prevent wastage and ensure a smoother installation experience.
Planning Your Layout
When you learn how to install LED lighting, one of the most crucial steps involves crafting a layout for your LED strips. This step defines how your space will be illuminated and is essential to achieving the desired aesthetic.

Begin by planning the route along which your LED strips will run, considering the location of nearby power sources and the overall visual effect you wish to create. Account for integral parts of your space, such as countertops, bed frames, or cabinets, and envision how the lighting will complement these features. Bear in mind that different spaces have different needs, so be careful when choosing the placement of your strips to avoid creating glare or uneven illumination.
Here are some suggestions for placements:
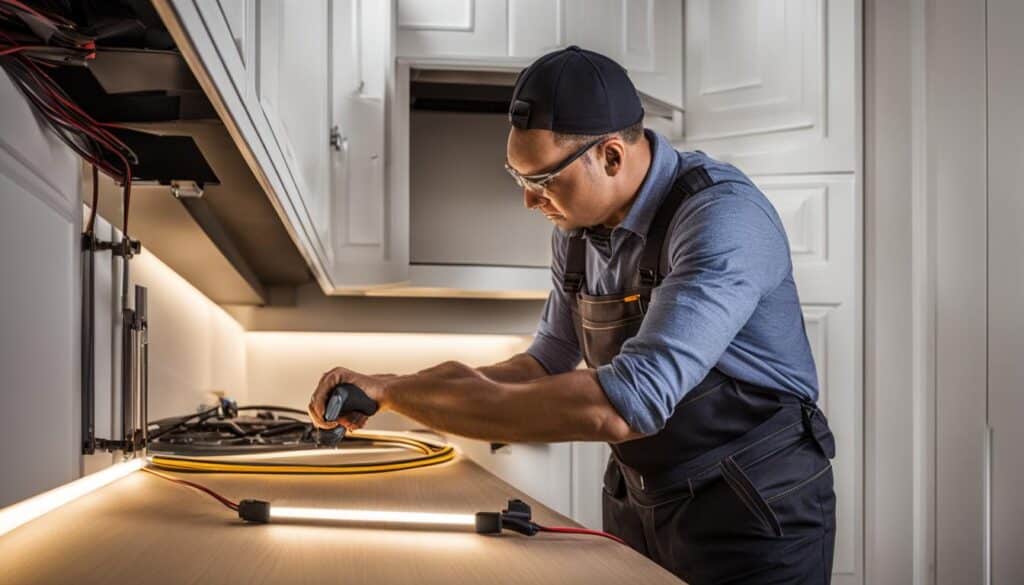
- Under kitchen cabinets for subtle countertop illumination
- Behind a TV or computer monitor to reduce eye strain
- Around a bed frame for a cozy, inviting atmosphere
- In a bookshelf for artistic accent lighting
Take your time during the layout planning process, as a well-thought-out layout can greatly enhance both the ambiance and functionality of your LED lighting installation.
Surface Preparation for Maximum Adhesion
Proper surface preparation is essential for ensuring a long-lasting and stable LED lighting installation. A clean, dry, and smooth surface is the key to getting strong, secure adhesion when applying LED strips to any area. In this section, we’ll go through the essential steps to prepare the surface for LED strip application, as well as provide tips to ensure easy and effective installation of your LED lighting.
Cleaning the Desired Area
To optimally prepare the surface, start by using a clean cloth and an appropriate cleaning agent to thoroughly scrub the area where you will be installing your LED strips. This helps remove any dirt, grease, or residue that could potentially weaken the adhesive’s grip on the surface. Remember that surfaces with stubborn stains may require a stronger cleaning solution or additional effort to ensure complete removal of any contaminants.
Drying and Smoothing the Surface
Before proceeding with the installation, make sure to adequately dry the cleaned area, ensuring that no traces of moisture remain. This will prevent the adhesive from losing its grip due to dampness or moisture. Additionally, inspect the surface for any bumps, rough or uneven patches, and remove or sand them down if necessary to create a smooth surface for your LED strip application.
Note: While preparing the surface for LED strip application, keep in mind that LED strips should not be applied to textured or porous surfaces to avoid adhesive failure over time. A smooth, non-porous surface will provide the best platform for maximum adhesion and stability.
With these tips for installing LED lighting, you’ll be well on your way to securing your LED strips for a long-lasting, easy LED lighting installation that adds ambiance to your chosen space.
Power Considerations for LED Lighting
An essential factor in any easy LED lighting installation is considering the various voltage requirements and power consumption of the LED strips. To ensure that your lighting system functions correctly, it is necessary to understand the specifications of your chosen strip and the power supply needed for its operation.
Most LED strips work on either 12V or 24V systems, with different wattages depending on their length. Calculating the total wattage required is a vital step in achieving a professional LED lighting installation. This calculation helps determine the minimum power supply capacity needed for your LED strips to function correctly and efficiently.
To do this:
- Multiply the watts per foot of your LED strip by its total length.
- Add 20% to that number to account for any fluctuations in power usage, and determine the minimum power supply required.
For example:
A 25 ft strip with a power consumption of 5.12 watts per foot would require at least a 153.6-watt power supply (25 ft x 5.12 watts per foot = 128 watts, then 128 watts + 20% = 153.6 watts).
| LED Strip Length | Watts per Foot | Total Wattage | Minimum Power Supply Capacity |
|---|---|---|---|
| 25 ft | 5.12W | 128W | 153.6W |
| 15 ft | 4.8W | 72W | 86.4W |
| 10 ft | 3.6W | 36W | 43.2W |
By following these simple calculations, you can ensure that your LED lighting installation remains safe, efficient, and visually stunning. Carefully considering the power requirements of your LED strips will provide longevity and energy-saving benefits for your lighting system.

How to Install LED Lighting
Now that you have prepared your surface and planned your layout, it’s time to dive into the actual installation process. Don’t worry; it’s more straightforward than you might think. In this section, I’ll walk you through affixing the LED strips and connecting extensions when needed.
Applying the LED Strips
Start off by peeling the backing off the adhesive and firmly pressing the strip onto the prepped surface—beginning at a spot close to a power outlet. As you move along, ensure that the strip is correctly aligned and make adjustments if necessary. Take your time here; a well-positioned strip will guarantee an appealing end result.
Trimming and Connecting Extensions
If you reach the end of your installation path and find that you have excess strip lighting, don’t fret. Simply use scissors to cut it off at the designated cut marks, which are usually indicated by gold pins or scissor icons. This will ensure a clean, tailored finish.
When extending the lights, make use of strip extensions or 4-pin connectors to seamlessly connect additional lengths. Just be careful not to bend the strips too sharply, as this could damage the LEDs or the circuitry. Keep the angles gentle and smooth.
And there you have it – a quick and easy guide on how to install LED lighting. With a little patience and planning, you’ll have a beautiful and functional illumination upgrade in no time. Happy DIY LED lighting installation!
Optimal Placement Techniques

Mastering optimal LED strip placement is one of the essential steps to install LED lighting and achieve the desired effect. To enjoy a more subtle glow, consider avoiding direct visibility. Hiding strips under cabinets or behind television sets makes for excellent accent lighting. It’s wise to use tools like quarter-round trim or flexible connectors, which can help obscure the strips while creating an attractive light source. Below are some professional LED lighting installation tips to enhance both the appearance and impact of your LED lighting:
- Under-cabinet lighting: Illuminate your countertop by mounting strips underneath your upper kitchen cabinets. This provides additional light for meal preparation without overwhelming the ambience.
- Around TV or media center: Install strips behind your television or around your media center to create an immersive viewing experience while reducing glare and potential eye strain.
- Accent furniture: Placing strips behind or under shelving units, bed frames, and desks highlights their unique shapes and adds character to the room.
- Staircase lighting: Add LED strips along the edges of staircases to improve visibility and accentuate the architectural design.
Taking the time to strategically place your LED strips can drastically enhance the look and feel of your space. Ensure that you carefully plan the placement to maximize the impact of your new LED lighting installation.
Creating Clean Angles and Corners
When it comes to LED lighting installation, attention to detail can make all the difference in creating a seamless and visually appealing result. In this section, we’ll discuss how to navigate corners and create precise angles using flexible connectors and proper trimming techniques for custom fits. By following these steps, you can ensure your LED lighting is both aesthetically pleasing and accurately aligned with the contours of your space.
Using Flexible Connectors
One of the challenges in LED lighting installation is maintaining a continuous light flow around corners or bends. Flexible connectors, designed specifically for LED strips, can be a solution to this problem. These connectors enable you to maintain a continuous light flow around 90-degree angles, ensuring smooth transitions between sections of your LED strip. By utilizing these connectors, you can create professional-looking corners that seamlessly blend with the design of your space.
Trimming LED Strips for Custom Fits
At times, you may need to trim your LED strips for a custom fit along walls, ceilings, or objects. To ensure proper functionality, always trim the LED strips only along the marked lines. These lines, often indicated by gold pins or scissor icons, signify the appropriate cutting points that will preserve the electrical connections of your LED strip. By correctly trimming your strips, you can create clean angles and corners that align accurately with your space while maintaining a polished look.
In conclusion, taking the time to master angles and corners is essential for a successful how to install LED lighting project. With the help of flexible connectors and proper trimming techniques, you can create clean, continuous light flows and achieve a sleek, professional finish that enhances the overall ambiance of your space.
Controlling Your LED Lighting
One of the most enjoyable aspects of LED lighting is the ability to customize and manage the ambiance in your home. Thankfully, achieving this desired effect is much easier than you might think. With tips for installing LED lighting and LED lighting installation tutorials at your side, you can explore various control options to find the one that best suits your needs and preferences.

Manual controllers are an excellent choice for those seeking a simple solution. These handheld devices allow you to adjust the brightness and color of your LED lights with convenience and ease. Just point, click, and create your desired ambiance.
For a more advanced approach, consider using smart apps or integrating your LED lighting with a home automation system. This option works especially well for addressable RGB LED strips, providing seamless control over colors, brightness, and synchronization with other devices in your home – all from the comfort of your smartphone or tablet.
Choose the control option that best fits your needs and enjoy the convenience of managing your home’s ambiance with just a click or a tap.
- Manual Controllers
- Smart Apps
- Home Automation Systems
In summary, the ability to control your LED lighting enhances the overall installation experience. Whether you prefer a manual approach or opt for a more advanced, automated solution, these control options ensure that your lighting is tailored specifically to your tastes and preferences, making for an impressive and enjoyable addition to your home.
Advanced Installation Tips for Enhanced Ambiance
For those seeking a more immersive LED lighting experience, consider adopting advanced installation techniques. By incorporating smart controls and apps, and strategically hiding the light installations, you can elevate the functionality and aesthetic of your LED strips.

Integrating Smart Controls and Apps
Maximize your LED lighting potential by integrating smart controls and apps into your professional led lighting installation. These tools allow you to synchronize your strips across multiple areas, promoting a cohesive and stunning lighting scheme throughout your home. Some popular apps compatible with LED strips include Philips Hue, LIFX, and Govee Home. With the addition of these controls, you can easily change colors, brightness, and set custom lighting schedules for a personalized and impressive ambiance.
Hidden Light Installations
Achieve a sleek and polished look with hidden diy led lighting installation. By tucking LED strips away from direct sight, you create an indirect glow that gently illuminates your space. Consider placing your strips behind or under furniture, inside cabinets, or within ceiling coves. This setup ensures your home is bathed in a charming radiance while maintaining clean, uncluttered aesthetics.
Conclusion
Installing LED strip lighting can be an exciting and rewarding DIY project that adds a luminous touch to any space. By following the steps to install led lighting provided in this guide, along with some advanced tips, you can create a personalized lighting design that not only looks professional but also enhances the ambiance and vibe of your home.
Remember the key aspects when embarking on your LED lighting journey:
- Choose the right LED strips suitable for your project.
- Properly prepare the surface for a long-lasting installation.
- Consider power requirements before proceeding.

With the right approach and a keen eye for detail, adding LED lighting to your space can be a straightforward and successful endeavor. Whether you’re looking to illuminate a room, create a cozy ambiance, or simply add flair to your home, this guide has offered essential tips for installing led lighting to get you started.
Reflection on LED Lighting Installation Journey
As I look back on my journey of installing LED lighting, I can’t help but appreciate the creativity and precision involved in the process. The energy-efficient nature of LED lights, combined with their versatile design, makes them an optimal choice for enhancing your living spaces. My goal with this LED lighting installation guide has been to demystify the installation process, offering valuable insights and practical advice to help you confidently undertake your own DIY LED lighting installation project.
From selecting the right product to controlling the ambiance, every step should be comprehended and executed with skill. Brands like Govee and Phillips Hue offer great options for customizable LED lighting, while Micomlan and Corsair cater to specific interests like music synchronization and bolder lighting effects. The power of customization allows you to create the perfect atmosphere for any occasion.
In the end, the success of your LED lighting installation comes down to proper planning, surface preparation, and attention to detail, ensuring optimal placement for the desired effect. Armed with the right knowledge and tools, your easy LED lighting installation can result in a stunning, energy-efficient upgrade that makes a huge difference in the ambiance of your home. With all said and done, it’s now time to step back, admire your handiwork, and enjoy the radiant glow of your newly installed LED lights.
FAQ
What are some popular brands for LED strip lights?
Some popular brands for LED strip lights include Govee, Phillips Hue, Micomlan, and Corsair.
What tools do I need for LED strip light installation?
You’ll need a measuring tape, a clean cloth, and possibly a ladder, depending on the installation location.
How do I plan the layout for my LED lighting?
Consider the location of power sources, the overall aesthetic, and how the lighting will complement existing features such as countertops, bed frames, or cabinets.
How do I clean the surface before installing LED strips?
Use a clean cloth with an appropriate cleaning agent to scrub the surface, removing grime, residue, or oils. Dry the area thoroughly before installing the LED strips.
How do I choose the right power supply for my LED strips?
Calculate the total wattage needed by multiplying the watts per foot by the strip’s total length. Add 20% to that number to determine the minimum power supply required.
How do I create clean angles and corners with LED strips?
Use flexible connectors designed for LED strips to maintain continuous light flow around 90-degree angles and trim along the marked lines for custom fits.
How do I control my LED lighting?
You can control your LED lighting with various options like manual controllers, smart apps, or integrating with home automation systems for addressable RGB LED strips.
What advanced installation tips can enhance my LED strip ambiance?
Integrate smart controls and apps to synchronize multiple LED strips and create hidden light installations for a sleek look with lights tucked neatly out of direct sight.

