

Recessed lighting has long been a popular choice for homeowners, as it provides a clean and modern look with its sleek design and inconspicuous integration into ceilings. However, there may come a time when your taste in aesthetic changes, or you want to upgrade to more energy-efficient options, leading you to the decision of how to remove recessed lighting fixtures on your own. In this guide, we’ll take you through the process of DIY recessed lighting removal step by step, while emphasizing the importance of removing recessed lighting safely.
Key Takeaways
- Proper tools and safety equipment are essential for removing recessed lighting safely
- Understanding the type of recessed lighting fixture you have (remodel or new-construction) is crucial
- Turn off the power and use a non-contact voltage tester before starting the removal process
- Terminating wires safely involves using an approved electrical box and wire nuts
- Consider painting the blank plate or patching the ceiling for a seamless look post-removal
- Consult a professional electrician if you’re unsure about any aspect of the removal process
Understanding Recessed Lighting and Energy Efficiency
Recessed lighting has grown in popularity due to its ability to blend seamlessly into various home decor styles, offering a modern, unobtrusive lighting option. However, personal preference and shifting trends may lead to homeowners considering a transition to a different lighting system. In this recessed lighting removal guide, we’ll discuss the role of recessed lights in home decor and explore the energy efficiency considerations that might prompt removal.
The Role of Recessed Lights in Home Decor
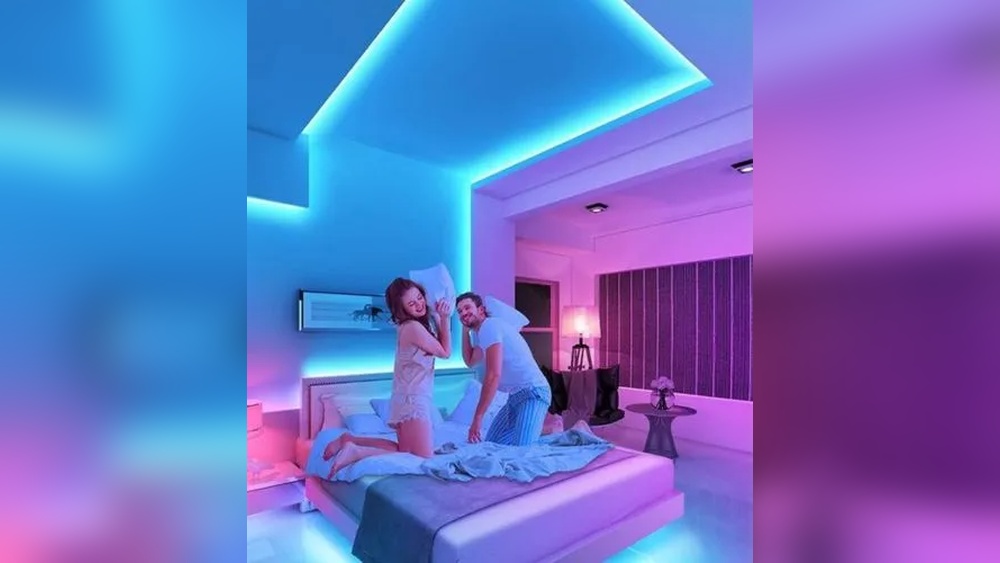
Recessed lights integrate smoothly into the ceiling, contributing to a wide variety of styles due to their discreet presence. They enhance lighting within a space without being intrusive, allowing for a more open and spacious feel. This versatile option is compatible with various decor styles such as minimalist, contemporary, and industrial designs. Moreover, recessed lighting provides a clean and uninterrupted ceiling, which can be particularly appealing for those seeking to maintain a sleek aesthetic throughout their living space.
Recessed lights: A modern touch that integrates seamlessly into various home decor styles, creating a clean and polished appearance.
Why Remove Recessed Lighting: Energy Considerations
While recessed lights offer an appealing design choice, some older models may lack energy efficiency, leading to increased energy costs. Homeowners looking to improve their home’s energy efficiency or reduce their carbon footprint may opt for a home decor lighting transition, removing old recessed lighting and installing more energy-efficient fixtures.
For example, traditional incandescent bulbs are notorious energy wasters – only about 10% of the energy they consume is converted into light, with the remaining 90% being emitted as heat. By contrast, newer light sources such as LED bulbs and energy-efficient fixtures can provide significant energy savings and lower utility bills. Accordingly, many homeowners opt for energy-efficient home lighting upgrades as part of their home renovation or energy improvement efforts.
- Replace incandescent bulbs with LED or CFL bulbs for energy savings and longer bulb life.
- Consider installing dimmers to control light levels and reduce energy usage.
- Install occupancy or vacancy sensors to turn lights on only when needed.
Knowing the energy efficiency of your current recessed lighting system is crucial in making an informed decision about whether to remove or upgrade it. By understanding the role of recessed lights in home decor and the energy efficiency implications, you can better determine the best course of action for your space and lifestyle.
Preparing for Recessed Lighting Removal
Before diving into the step-by-step recessed lighting removal process, it’s crucial to be well-prepared by gathering all the necessary tools and having a clear understanding of the type of recessed lighting fixtures you’re dealing with. Here’s a quick rundown of what to expect as you start preparing for DIY recessed lighting removal:
- Gather essential tools
- Understand your lighting configuration

A successful removal starts with having the right tools on hand. Some of the essential items you’ll need include:
- Wire stripper/cutter
- Non-contact voltage tester
- Safety equipment (gloves, safety glasses, etc.)
It’s essential to have these tools within easy reach as you navigate the process, ensuring a safe, efficient, and seamless experience. For a comprehensive list of tools and their importance, refer to the upcoming section on essential tools for removing recessed lighting.
Understanding your lighting configuration
Recessed lights come in two primary configurations: remodel and new-construction types. Knowing which type you’re working with is crucial, as it determines the removal process. Remodel fixtures are generally easier to work with, as they’re designed for retrofitting into existing ceilings and are more accessible.
Remodel fixtures are often held in place by spring-loaded clips or screws, while new-construction types are typically attached directly to ceiling joists.
By identifying the type of recessed lighting you’re dealing with and gathering the appropriate tools, you’ll be well-prepared for a smooth and efficient removal process. Stay tuned for a detailed, step-by-step recessed lighting removal guide that will walk you through the entire procedure from start to finish.
Essential Tools for Removing Recessed Lighting
Whether you are a DIY enthusiast or a homeowner looking to save some money on professional fees, having the right tools for removing recessed lighting is crucial for efficient and safe work. In this section, we discuss the must-have tools in your DIY toolkit and highlight some specialty tools needed for specific light models.
Gathering Your DIY Toolkit
Before diving into the removal process, make sure you have these essential tools on hand:
- Wire stripper/cutter
- Cable ripper
- Cordless drill
- Non-contact voltage tester
- Flashlight or headlamp
- Step ladder
- Remodel ceiling electrical box
- Non-metallic round blank ceiling box cover
- Wire nuts
- Electrical tape
Each of these tools plays a key role in the safe and efficient removal of recessed light fixtures, ensuring a well-executed project.
Identifying Specialty Tools for Specific Light Models
Beyond the basic tools listed above, some recessed lighting models may require specialty tools for effective removal. For example:
- Spring-loaded clips, which may be needed for fixtures that have clips securing the housing to the ceiling
- Twist-lock mechanisms, which require a specific tool for unlocking the fixture from the housing
Identifying whether these specialty tools are necessary is crucial for tackling specific light models, ensuring that the correct procedures are followed during removal.
Tip: Before starting any removal work, research the specific light model you have and determine which, if any, specialty tools are needed for its removal. This saves time and ensures a smooth process.
| Essential DIY Toolkit | Specialty Tools for Specific Light Models |
|---|---|
| Wire stripper/cutter | Spring-loaded clips |
| Cable ripper | Twist-lock mechanisms |
| Cordless drill | |
| Non-contact voltage tester | |
| Flashlight or headlamp | |
| Step ladder | |
| Remodel ceiling electrical box | |
| Non-metallic round blank ceiling box cover | |
| Wire nuts | |
| Electrical tape |
In conclusion, having the necessary tools at hand, including the basic DIY toolkit and any specialty tools, will ensure efficient removal of recessed lighting. By understanding the specific light model you are working with and preparing accordingly, the process will be safer and more manageable.
Turning Off the Power Safely
When it comes to safe recessed lighting removal, taking steps to ensure the power is turned off safely is essential. Here’s a brief guide on how to deactivate your recessed lighting and create a secure environment for your project:
Identifying the Correct Circuit Breaker
Before you begin the removal process, locate and turn off the correct circuit breaker for the recessed lighting. Electrical circuit identification is crucial for keeping both you and your electrical system safe. To prevent the breaker from being accidentally turned on during the removal process, place a strip of painter’s tape over the switch as a safeguard.

Ensuring a Safe Work Environment
Adhering to safe work environment practices is vital to reducing the risk of accidents during recessed lighting removal safety. This involves taking the following precautions:
- Use a sturdy ladder to access the recessed lighting.
- Wear protective gear such as gloves and safety glasses to guard against any potential hazards.
- Ensure the workspace is well-lit, either by a flashlight or headlamp, to improve visibility.
- Maintain a neat workspace, free of clutter and tripping hazards, throughout the removal process.
Once your work environment is secure, use a non-contact voltage tester to confirm that the power is off before proceeding with the removal process. This straightforward safety measure minimizes the risk of injury due to live electrical currents, guaranteeing a smooth and secure DIY project.
Remember: Safety always comes first when working with electrical systems. Carefully follow these steps to avoid any mishaps during your recessed lighting removal process.
Step-by-Step Recessed Lighting Removal Guide
Removing your recessed lights is a practical and approachable DIY task when you follow a systematic process. Let’s dive into the step-by-step guide that will help you efficiently remove your recessed lights:
- Turn off the Power: Turn off the power to your recessed lighting circuit by switching off the appropriate breaker at your electrical service panel. Place a strip of painter’s tape over the switch to prevent others from accidentally turning it on.
- Remove the Light Bulb and Trim: Carefully unscrew and remove the light bulb from the fixture, followed by gently detaching the trim or baffle from the light housing. Be sure to safely set aside the components for future reference or disposal.
- Identify the Light Type: Before proceeding with removal, determine whether your recessed light is a remodel or new-construction type. Remodel fixtures typically have clips or a twist mechanism securing them, while new-construction fixtures may be screw-mounted or attached to ceiling joists.
- Loosen Clips or Screws: Depending on your light type, loosen the clips holding the lighting fixture to the surrounding ceiling or unscrew the fixture from the ceiling joists.
- Test for Live Wires: With a non-contact voltage tester, double-check that the wires connected to the fixture are not live. This crucial step ensures your safety during the remainder of the removal process.
- Disconnect the Wires: After confirming the absence of live electricity, disconnect the wires connected to the fixture by removing wire nuts and detaching the wires from their connections.
- Secure Wires in a Remodel Box: Strip the sheathing from the wires and secure them inside a remodel box with wire nuts and electrical tape. For added safety, organize the wires neatly within the box to avoid potential issues down the line.
- Install the Blank Plate: As the final step, attach a blank plate over the remodel box, ensuring that the plate is flush with the ceiling surface. This way, you are keeping connections insulated and code-compliant.
Following these recessed lighting removal steps will keep your DIY lighting removal process safe and efficient. By understanding the importance of each action and practicing good electrical safety, you can make necessary changes to your home’s lighting with confidence.
Handling Wires and Electrical Safety

It is essential to prioritize electrical safety in lighting removal and adhere to wire termination best practices. This section focuses on the proper handling of electrical wires during recessed lighting removal and evaluates considerations for deciding whether to remove or leave old wires in place.
Proper Wire Termination Techniques
Terminating wires safely within an approved electrical box is crucial to avoid any future electrical hazards. The following steps should be followed for proper wire termination:
- Strip the wire sheathing to expose the live, neutral, and ground wires.
- Twist the stripped end of the corresponding wires together, incorporating all live wires, all neutral wires, and all ground wires.
- Secure a wire nut to each group of twisted wires, ensuring a tight connection.
- Wrap the wire nuts with electrical tape for added security.
- Insert the terminated wires into the remodel box and attach the box to the ceiling, making sure it is flush with the surface.
Deciding Whether to Remove or Leave Wires
It’s acceptable to leave dead wires in place; however, if safe and feasible, fully removing old wires is recommended to eliminate the possibility of later energization. When in doubt, consulting with a professional electrician for wire removal is advisable.
Here are some factors to consider when evaluating wire removal:
| Factors | Remove Wires | Leave Wires |
|---|---|---|
| Accessibility | If the wires are easily accessible, it’s safer to remove them. | If the wires are inaccessible without causing significant damage, it’s better to leave them. |
| Building Code Compliance | Check local building codes to determine if removal is necessary. | If the building codes permit leaving dead wires, consider insulating them and labeling them as inactive. |
| Risk of Energization | If there’s a chance the old wires could become energized in the future, removing them is necessary. | If there’s no foreseeable possibility the wires will become energized, consider leaving them in place. |
Remember, for safe electrical wire handling during recessed lighting removal, always follow best practices and consult a professional electrician when unsure of how to proceed.
Installing the Remodel Box and Blank Plate
After successfully removing the recessed lighting fixtures, the next step is to work on the exposed wires. You need to ensure their termination and secure them in a remodel box. This process is essential to prevent any electrical hazards and achieve a polished result in your project.
To properly install a remodel box and blank plate, follow these steps:
- Terminating and securing electrical wires: Carefully strip the wire sheathing and twist together the corresponding wires. After connecting each pair, attach wire nuts to ensure a safe termination. Cover the twisted wires with electrical tape for added insulation.
- Installing the remodel box: Place the remodel box flush with the ceiling surface, enclosing the terminated wires. Make sure the remodel box sits securely, which may require you to attach it to the ceiling joists or adjacent drywall.
- Installing the blank plate: Center the blank plate over the remodel box and secure it by screwing it into place. This blank plate installment for recessed lighting ensures that the electrical wiring is safely insulated and complies with codes.
A successfully installed remodel box and blank plate guarantee a secure, professional-looking result in your home improvement project. It allows you to achieve safe electrical insulation and code compliance while also keeping a neat aesthetic.
Painting and Aesthetics Post-Removal
Once you have safely removed the recessed lighting fixtures and installed a blank plate, it’s time to focus on your ceiling aesthetics after lighting removal. Paying attention to the painting and overall appearance of the ceiling helps create a seamless final look. In this section, we’ll explore matching ceiling paint tips and aesthetic solutions for removed lighting.

Tips for Matching Ceiling Paint
Match the ceiling paint to cover the blank plates or any patches after removing the recessed lighting. Here are some tips for finding the right paint:
- Take a small sample of your existing ceiling paint to a local paint store for color matching.
- Consider using a color-coded fan deck to compare the shades and find the closest match.
- If you don’t have a sample and your ceiling is a standard white shade, use a specially formulated universal ceiling paint that blends with a variety of white tones.
- Avoid direct sunlight while comparing paint shades, as it might cause color distortion.
When painting, use a roller with an extension pole for even coverage and smooth finish on the ceiling
Hiding the Evidence of Removed Lighting
Creating a seamless, visually appealing ceiling after removing recessed lighting involves more than just painting plates. Here are some suggestions for concealing light removal signs:
- If the removal involved cutting out significant ceiling areas, patch them with drywall and ensure the edges blend into the existing ceiling.
- Consider applying a skim coat of joint compound to level out any imperfections on the patched areas.
- Prime the patched areas to improve paint adhesion and uniformity. Priming also prevents stains and ensures a consistent final appearance.
- To create a more cohesive appearance, especially in rooms with multiple removed fixtures, consider repainting the entire ceiling rather than just the patched areas.
By following these tips for matching ceiling paint and hiding the evidence of removed lighting, you can create a visually appealing and seamless look for your ceiling after the removal process is complete.
Professional Versus DIY Recessed Lighting Removal
Although DIY recessed lighting removal can be an achievable project for many homeowners, there are certain situations that may call for professional assistance. When dealing with more complex scenarios, such as new-construction lights secured to ceiling joists, elaborate electrical systems, or navigating code compliance, it is wise to seek expert tips for recessed lighting removal.
When to Call in an Expert
Here are a few circumstances where seeking professional help with recessed lighting removal is recommended:
- Difficult access to fixtures: If the lighting fixtures are hard to reach due to high ceilings or tight spaces, it’s best to rely on a professional with specialized equipment and experience.
- New-construction lights: Removing new-construction lights attached to ceiling joists can be more complicated, and improper removal may cause damage to the structure.
- Complex electrical configurations: In cases where the electrical wiring is intricately connected with multiple fixtures or other electrical components, a professional electrician has the knowledge to safely and efficiently handle the removal.
- Ensuring code compliance: A professional can guarantee that any changes, such as rewiring or altering junction boxes, adhere to local building codes and safety standards.
While DIY removal can save money and offer homeowners a sense of accomplishment, it’s essential to recognize when a project is beyond your skillset and requires professional recessed lighting removal methods. The safety and integrity of your home should always be a top priority.

In conclusion, don’t hesitate to consult with a professional electrician if you’re uncertain about your ability to carry out a successful and safe recessed lighting removal. Their expertise and specialized tools can save time, prevent potential damage, and ensure adherence to necessary safety standards.
Conclusion
In summary, removing recessed lighting can be a quick and easy DIY project with the proper tools, safety precautions, and preparation. Understanding the basics of recessed lighting, as well as energy efficiency benefits, can provide valuable insights into making the decision to update or remove these fixtures from your home.
By following a step-by-step recessed lighting removal guide and using essential tools, you can ensure a safe and efficient removal process. Whether you’re looking to remove older, energy-consuming fixtures for more energy-efficient options, or simply need to change for an aesthetic update, the removal process can enhance the overall function and style of your home.
Keep in mind, while many homeowners may feel comfortable tackling this process themselves, certain scenarios may require help from a professional electrician. Evaluating your individual circumstances and knowing when to call in an expert will ensure a seamless and successful removal process for your recessed lighting.
FAQ
Why should I consider removing recessed lighting?
You may opt for removing recessed lighting to update your home decor, improve energy efficiency, or replace old and outdated fixtures.
What tools are needed for recessed lighting removal?
Essential tools include a wire stripper/cutter, cable ripper, cordless drill, non-contact voltage tester, flashlight or headlamp, step ladder, remodel ceiling electrical box, a non-metallic round blank ceiling box cover, wire nuts, and electrical tape.
How do I identify the correct circuit breaker to turn off the power?
Start by turning off the recessed light circuit at the electric service panel and placing a strip of painter’s tape over the switch to prevent accidental energization. Verify the power is off using a non-contact voltage tester before starting the removal process.
What are some safety precautions I should take when removing recessed lighting?
Use a sturdy ladder, wear protective gear such as gloves and safety glasses, and ensure the workspace is well-lit. Always verify the power is off using a non-contact voltage tester before beginning the removal process.
How do I properly terminate wires after removing recessed lighting?
Strip the wire sheathing, secure wire nuts to each wire, and attach the wires in the remodel box. Wires should be contained within an electrical box that is flush with the ceiling surface and accessible.
What is the purpose of a remodel box and blank plate after removing recessed lighting?
Installing a remodel box and blank plate after removing recessed lighting ensures safe electrical insulation, code compliance, and a more aesthetic appearance. These components cover the exposed wires, creating a more cohesive look.
When should I consider calling a professional electrician to remove recessed lighting?
While DIY removal is often plausible, scenarios like dealing with new-construction lights attached to joists, complex electrical configurations, or ensuring code compliance may warrant calling in a professional electrician for assistance.


River
Removing recessed lighting? Who needs that extra lighting anyways? Embrace the darkness!