
H1: Guide: How to Remove Bulb from Recessed Lighting Easily
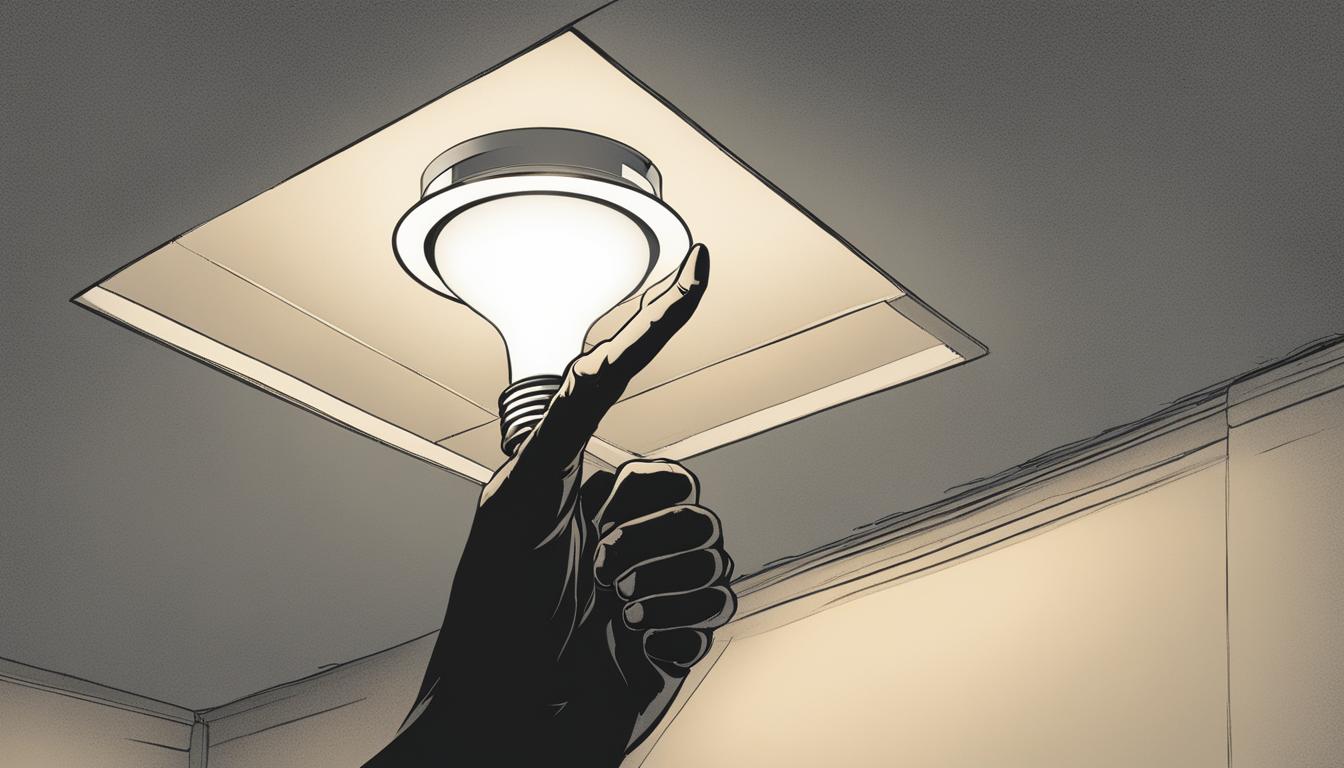
Have you ever found yourself puzzled about how to remove a bulb from recessed lighting? If so, you’re not alone. Recessed lighting adds a sleek and modern touch to your home, but changing the bulb can seem intimidating. Luckily, with the right tools and understanding of the process, DIY bulb removal from recessed lighting can be a breeze. In this guide, I will walk you through the steps for easy bulb removal, and even offer you some handy visual aids to help make this process as straightforward as possible.
Key Takeaways
- Tools and safety equipment are essential for a smooth bulb replacement process.
- Understanding the type of bulb and fixture you have will help determine the appropriate removal method.
- Preparing and following necessary safety precautions should always be prioritized.
- Replacing the bulb with a compatible option ensures optimal performance and longevity.
- Proper bulb disposal and maintenance help extend the life of your recessed lighting and minimize environmental impact.
Understanding Recessed Lighting and the Need for Bulb Replacement
Recessed lighting, commonly referred to as canned lighting, offers a modern, sleek, and versatile option for various décor styles. As an integral part of a ceiling or wall, it provides both functionality and aesthetic appeal. Much like any other lighting fixture, recessed light bulbs will eventually need replacing, either due to burnout or for updating purposes.
There are several factors to consider when it comes to replacing recessed light bulbs, including the type of bulb, the condition of the housing, and the overall need for a bulb replacement. Identifying the right replacement bulb is crucial to maintain the optimal performance of your recessed lighting.
Pro Tip: Check your recessed lights regularly to ensure consistent, high-quality illumination, and reduce the likelihood of unexpected burnouts or other issues.
Below is a table highlighting some common types of recessed lighting fixtures and their corresponding bulb types:
| Recessed Fixture | Type of Bulb |
|---|---|
| Standard Recessed Can | BR (Bulged Reflector), PAR (Parabolic Aluminized Reflector), MR (Multifaceted Reflector) or R (Reflector) |
| Adjustable Gimbal Recessed Can | MR (Multifaceted Reflector) or PAR (Parabolic Aluminized Reflector) |
| Shallow Recessed Can | PAR (Parabolic Aluminized Reflector) or R (Reflector) |
| Square Recessed Can | BR (Bulged Reflector) or PAR (Parabolic Aluminized Reflector) |
In addition to identifying the appropriate type of bulb for your recessed lighting fixture, it is essential to understand the wattage requirements and other specifications. The size of the recessed can will impact the wattage and type of bulb needed, as varying sizes may necessitate different bulbs.
- For 4″ diameter cans, consider BR30 bulbs.
- For 6″ diameter cans, opt for BR40 bulbs.
By recognizing the specific requirements of your recessed lighting fixtures and understanding the need for bulb replacement, you can proactively maintain optimal lighting performance and safety in your home.
Preparation is Key: Tools and Safety Equipment
Before you start with your bulb replacement project, it is crucial to gather all the necessary tools and safety equipment. This will ensure a smooth and safe process, reducing the risk of accidents or damage to your recessed lighting. Let’s go through each step of the preparation process.
Gathering Your Tools for Bulb Removal
First, compile a list of tools that you will need for the task. These include:
- A compatible replacement bulb
- A sturdy ladder or step stool for reaching the fixture
- A screwdriver, which may be required for potential trim removal
- Optional gloves and safety glasses for protection
- A voltage tester to ensure power is safely cut off before starting

Importance of Safety Measures
As with any DIY project involving electricity, safety must be your top priority. Make sure to:
- Prioritize safety by turning off the power from the circuit breaker box or fuse panel before starting.
- Wait for a hot bulb to cool before attempting to replace it. Handling a hot bulb without allowing it to cool can cause burns or breakage.
- Use protective gear like gloves and safety glasses to shield yourself from potential hazards, such as broken glass or electrical shock.
Ensuring the Correct Replacement Bulb
Selecting the proper replacement bulb for your recessed lighting fixture is essential for optimal performance and longevity. To choose the right bulb, you should:
- Match the wattage and type of the original bulb to ensure compatibility and prevent premature failure.
- Consider the size of the recessed can for optimal fit. For example, BR30 sizes are suitable for 4″ diameter cans, while BR40 sizes fit 6″ diameter cans.
By adequately preparing for the task, assembling the necessary tools, and following safety protocols, you can efficiently and safely remove and replace bulbs in your recessed lighting fixtures.
Step One: Safety First – Powering Down
When dealing with electrical fixtures such as recessed lighting, safety is always a top priority. To ensure safety in bulb removal, the first step is to power down the lights, effectively cutting off the electrical supply to the fixture.
Before you begin handling the recessed lighting fixture, locate the circuit breaker or fuse panel in your home. Identify the switch or circuit corresponding to the lighting fixture that you are working on. Turning off the appropriate circuit breaker is essential for your safety during the bulb removal process.
Once you’ve powered down the lights, give it a few moments to ensure there is no residual current in the system. This extra precaution allows you to carry out the bulb removal process with peace of mind, knowing that the risk of electrical shock has been eliminated.
Remember, staying safe should be your highest priority when dealing with any electrical work, including changing bulbs in recessed lighting fixtures. Powering down the lights and using proper safety equipment like gloves and safety glasses can make all the difference.
Step Two: Accessing the Recessed Bulb
Before diving into the process of accessing the recessed bulb, it’s important to recognize and understand the specific type within your fixture. Different bulbs may be secured with various mechanisms, such as clips or twist-lock systems.

Identifying Bulb Types in Recessed Fixtures
Knowing the type of bulb in your recessed lighting is essential to planning the appropriate removal method. Some common recessed bulb types include:
- BR (Bulged Reflector)
- MR (Multifaceted Reflector)
- PAR (Parabolic Aluminized Reflector)
- R (Reflector)
Determining the specific bulb type used in your fixture enables you to employ the correct techniques during the removal process.
Strategies for Reaching Your Recessed Bulb
For high or difficult-to-reach bulbs, consider using tools such as a ladder or specialty light bulb changing poles with multiple attachments for different bulb situations. These tools allow you to safely and easily access the recessed bulbs for removal and replacement. In some cases, you might need to remove trim pieces from the fixture to better access the bulb—having a screwdriver on hand can be helpful in these instances.
Handling a Hot or Stuck Bulb
Remember to always prioritize safety when working with recessed lighting fixtures, especially if the bulbs are hot or stuck. If a bulb is hot, allow it to cool fully before attempting removal. In the case of stuck bulbs, employ techniques such as loops of duct tape or specialized tools like a suction cup attachment to aid in the removal process.
Safety Tip: Never attempt to remove a hot or stuck bulb without the proper precautions and tools in place. Doing so could result in injury or property damage.
By understanding the nuances of your specific lighting fixtures and bulbs, and using the right techniques and tools for the job, accessing recessed bulbs can become a simple and smooth process. With these tips in hand, you’ll be well-equipped to safely and successfully tackle your next bulb removal project.
Step Three: The Removal Process
Now that you have safely accessed the recessed lighting, it’s time to move on to the actual removal process. Whether you’re dealing with spring clips, twisting counterclockwise, or employing other removal methods, make sure to carefully extract the bulb from its housing to avoid causing any damage to the fixture. Follow our step-by-step guide for bulb removal from recessed lighting to ensure success:
- Identify the type of bulb and the method of removal appropriate for your specific fixture.
- Ensure both your hands and the bulb are dry. Wearing gloves may provide a better grip and protect from potential breakage.
- If your bulb is a twist-lock type, grip the bulb firmly, and twist counterclockwise until it is released. For other types like clip-in bulbs, you may need to slightly tilt the bulb to disengage the clips.
- Gently pull the bulb until it comes free from the housing, avoiding applying too much force that could damage the socket or the fixture.
Remember: Always be patient and gentle when removing a bulb from recessed lighting to prevent any damage to the fixture or injury to yourself.
Once you’ve successfully removed the old bulb, you can proceed to the next step of installing the new bulb, ensuring a bright and efficient replacement for your recessed lighting.
Step Four: Installing the New Bulb

After successfully removing the old bulb, it’s time to install the new one. To ensure a smooth installation process and optimize bulb longevity, follow these essential steps.
Alignment and Insertion Tips
For twist-lock bulbs, align the tabs on the base of the bulb with the slots in the socket, then turn it clockwise until it’s secured. For other types of bulbs, gently push the bulb into the socket until seated without over-tightening. Tip: Make sure the replacement bulb fits well within the recessed can and is of the correct wattage to prevent premature failure and maintain optimal performance.
Optimizing Bulb Longevity and Performance
To maximize the lifespan of your new bulb and ensure consistent performance, take the following precautions:
- Choose the correct wattage for your specific fixture.
- Make certain that the bulb fits snugly within the recessed can.
- Keep the bulb free of dust and debris by cleaning it regularly.
Double-Checking Your Installation Work
After installing the new bulb, it’s essential to verify your work to prevent any issues with power restoration and bulb performance. Here are some key things to double-check:
- Ensure that the bulb is firmly seated in the socket, without being over- or under-tightened.
- Inspect the recessed can to confirm the bulb is sitting flush with the fixture.
- Keep an eye out for any visible damage or inconsistencies that might cause complications later on.
Following these steps will help ensure a smooth and successful bulb installation, resulting in reliable performance and an extended bulb lifespan.
Step Five: Testing and Troubleshooting
Once you have successfully replaced the bulb in your recessed lighting fixture, it’s time to test its functionality and troubleshoot any potential issues. Follow these steps to ensure that your new bulb is working as expected:
- Restore power: Turn the power back on at the circuit breaker or fuse panel and ensure the light switch is in the “on” position.
- Test the new bulb: Observe whether the newly installed bulb is working correctly. If not, double-check the power supply and try the light switch again.
If your recessed lighting fixture still isn’t functioning correctly, try troubleshooting some common issues:
| Issue | Potential Solution |
|---|---|
| Loose connection | Check the bulb’s seating and the wiring connections. Ensure that the bulb is securely fitted in its socket and that all connections are properly tightened. |
| Incorrect bulb type | Examine the type of bulb required for your specific recessed lighting fixture, and ensure the installed bulb is a perfect match. If necessary, replace the bulb with the correct type. |
| Recessed lighting issues | Inspect the fixture and its components for any visible damages or issues. If necessary, consult a professional for further diagnosis and repairs. |
By testing your new bulb and troubleshooting any bulb installation or recessed lighting issues, you can quickly ensure that your home’s lighting is back in excellent working condition. Remember to always prioritize safety and consult a professional if you’re unsure about any aspect of the process.
Understanding Bulb Types and Their Specific Removal Techniques
Recessed lighting fixtures can contain various types of bulbs, each with their unique removal and replacement methods. This section explores the common bulb types used in recessed lighting and their specific removal techniques, ensuring that you choose the correct replacement bulb and follow the appropriate method for a successful bulb change.

- BR Bulbs: These bulbs, also known as reflector bulbs, provide a wide floodlight beam and are common in residential spaces. To remove a BR bulb, grasp it firmly near the base, twist counterclockwise, and pull it out gently.
- MR Bulbs: MR (Multifaceted Reflector) bulbs are small and often used in track lighting or small recessed fixtures. Like BR bulbs, they can also be removed by gripping the bulb near the base, twisting counterclockwise, and pulling it out gently.
- PAR Bulbs: These bulbs (Parabolic Aluminized Reflector) are used for directional lighting and have a tapered base. They can be removed by gently twisting them counterclockwise and pulling them out from the base.
- R Bulbs: R bulbs (Reflector) are similar to BR bulbs but have a more narrow floodlight beam. The removal process is the same as for BR and MR bulbs – twist counterclockwise and gently pull the bulb out.
Take note of your fixture’s specific bulb type and utilize the corresponding removal technique for a seamless replacement process. In addition to the above-listed bulb types, recessed lighting can also include specialty bulbs, such as LEDs or those with unique housings and clips. Always refer to the manufacturer’s guidelines for the most accurate removal and installation instructions.
| Bulb Type | Removal Technique |
|---|---|
| BR | Twist counterclockwise and pull out gently |
| MR | Twist counterclockwise and pull out gently |
| PAR | Twist counterclockwise and pull out gently |
| R | Twist counterclockwise and pull out gently |
Always consult your light fixture’s guidelines to ensure you are adhering to the appropriate bulb removal technique for the specific type of bulb installed.
Considerations for Special Types of Recessed Lighting
When dealing with special types of recessed lighting, it’s important to take into account the unique characteristics and requirements each type may present. Some examples include LED bulbs, integrated LED fixtures, adjustable housings, and spring-loaded clips. Understanding the specifics of each fixture can help ensure a smooth replacement process without damage or frustration.
First, let’s discuss some of the common special recessed lighting considerations and unique recessed bulb types out there:
- LED bulbs: These energy-efficient options require a compatible dimmer switch and may come in retrofit models designed to fit existing housings.
- Integrated LED fixtures: Rather than a replaceable bulb, these units have built-in LED modules, which may require the entire fixture to be replaced when they fail.
- Adjustable housings: Some recessed lighting fixtures have adjustable housings that can be swiveled or angled to direct light in specific directions, requiring special care during replacement.
- Spring-loaded clips: Certain recessed fixtures utilize spring-loaded clips to secure the trim, necessitating careful removal and installation practices to avoid unwanted damage.

When replacing bulbs in special types of recessed lighting, it’s crucial to follow the manufacturer’s guidelines and recommendations to ensure compatibility and proper installation. Here are some general tips to keep in mind:
Always check the compatibility of the replacement bulb with your specific fixture in terms of size, wattage, and support for dimming functions.
- For LED retrofit bulbs, ensure that the collar or adapter is securely and correctly connected to the existing housing.
- If your fixture has adjustable housings, cautiously handle the housing during the replacement process to avoid damaging any adjustable components.
- When working with spring-loaded clips, use a gentle touch while removing or securing the trim. Be mindful of the clips’ position and don’t force them to prevent breakage.
- Seek professional help if your fixture requires a complete replacement due to the failure of an integrated LED module or any other complex, integrated components beyond simple bulb replacement.
Considering these special recessed lighting considerations can make the process of changing bulbs in unique recessed fixtures less daunting and more manageable. Becoming familiar with the intricacies of your specific fixture type will ensure a successful bulb replacement and result in safe, functional, and visually pleasing recessed lighting.
Maintaining Your Recessed Lighting for Long-Term Use
Recessed lighting is a popular choice for homeowners who want to create a sleek and modern look. However, maintaining recessed lighting is essential for long-lasting performance and safety. In this section, we will discuss cleaning and care for recessed lights, when to consult a professional, and the importance of regular maintenance checks.
Cleaning and Care for Recessed Lights
To ensure that your recessed lighting remains functional and looks its best, be sure to clean the fixtures regularly. This can be accomplished by:
- Wiping down the housing and trim with a damp cloth
- Removing dust, dirt, and debris from inside the fixture
- Cleaning the bulb, if necessary, using an appropriate cleaning solution
By keeping your recessed lighting clean, you can maintain both its aesthetic appeal and functionality.
When to Consult a Professional
If discomfort or uncertainty arises while attempting to change a bulb or if specialized lighting systems are in place, consulting a professional is advised to prevent damage or ensure safety. Additionally, if you encounter any problems during routine maintenance, such as flickering lights, humming noises, or unusual heating of the fixtures, it’s crucial to reach out to a professional consultation for lighting to address these issues promptly.
Regular Maintenance Checks
Performing regular maintenance checks on your recessed lighting is essential to extend their lifespan and keep them functioning properly. Here are a few reasons why periodic checks are vital:
- Prevent sudden failure: Regularly inspecting your lighting system can help you identify any potential issues before they lead to a sudden malfunction or failure.
- Ensure continuous optimal lighting: By keeping an eye on your lighting, you can ensure that it continues to provide the desired ambient levels and remains energy-efficient.
- Avoid potential hazards: Worn-out or defective bulbs can pose a safety risk, so it’s crucial to replace them as needed.
Ultimately, regular checks and timely replacement of bulbs can prevent sudden failure, ensure continuous optimal lighting, and can also prevent potential hazards related to worn out or defective bulbs. By following these maintenance tips, you can keep your recessed lighting system in top condition and enjoy its benefits for years to come.
DIY Tips and Tricks for Easy Bulb Removal from Recessed Lighting
When it comes to quick and safe bulb removal from recessed lighting, some DIY bulb removal tips can make the process much smoother and stress-free. By using the right tools and techniques, you can prevent potential damage and ensure a successful bulb replacement. Here are a few handy tips for removing the bulb from recessed lighting:

- Use a stable ladder or step stool to reach the recessed lighting fixture safely. Make sure that the ladder is secured, and you are comfortable with its height before starting.
- Wait for the bulb to cool down completely before attempting to remove it to avoid burning your hands or damaging the socket.
- Employ a light bulb changing pole for hard-to-reach bulbs, especially if they are located in high or vaulted ceilings. These poles come with multiple attachments for different bulb situations and make the removal process much more accessible.
- For stuck bulbs, try using clever hacks like loops of duct tape to unscrew the bulb. You can also use a suction cup attachment or rubber jar opener to provide extra grip.
- Consider wearing gloves and safety glasses to protect your hands and eyes from any debris or broken bulbs during the removal process.
- Double-check the replacement bulb type and size to ensure compatibility with your recessed lighting fixture before installation.
In addition to these DIY removal tips, it’s essential to maintain your recessed lighting fixtures regularly for their long-term performance and safety. By keeping these tips in mind, you can make the bulb replacement process a breeze and get your recessed lighting back to its optimal performance.
Best Practices for Bulb Disposal and Environmental Considerations
Proper bulb disposal is essential in order to minimize environmental impact and maintain a sustainable lifestyle. It’s important to understand the type of bulb being replaced and to follow local regulations for disposal or recycling, especially for LED or other specialty bulbs.
To make it easier for you, here are some best practices for bulb disposal and environmental considerations for bulb disposal, ensuring that you’re making the right choices in your home:
- Know your bulb type and proper disposal method.
- Consult your local waste management facility for disposal or recycling guidelines.
- Consider using a light bulb recycling service if available in your area.
- Store used bulbs safely until they can be disposed of or recycled properly.
Some common bulb types and their appropriate disposal practices include:
| Bulb Type | Disposal Method |
|---|---|
| Incandescent Bulbs | Can be disposed of in regular household trash, but consider recycling or donating if in good condition |
| Compact Fluorescent (CFL) Bulbs | Contain small amounts of mercury; recycle at designated recycling facilities |
| LED Bulbs | Low environmental impact; recycle at designated recycling facilities |
| Halogen Bulbs | Can be disposed of in regular household trash but consider recycling if possible |
While recycling light bulbs is the most environmentally-friendly option, it’s not always possible or practical. In such cases, make sure to dispose of bulbs safely and in accordance with local regulations.
Remember: Responsible bulb disposal is not only an environmentally conscious choice, but it also contributes to a safer and cleaner living space for you and your family.
By following these best practices for bulb disposal and considering the environmental consequences of your actions, you’re not only protecting the planet but also fostering a sustainable and eco-conscious lifestyle. Keep these guidelines in mind whenever you need to dispose of or replace your light bulbs, and play your part in preserving our environment for future generations.
Conclusion
After exploring this guide, it should now be clear that replacing bulbs in recessed lighting is a manageable DIY task. With the right tools and understanding, homeowners can easily tackle this project and achieve excellent results, without needing professional help.
As a recap, properly preparing yourself with the necessary safety equipment and knowing which replacement bulbs to use is critical for successful and safe bulb changes. Familiarizing yourself with the various types of bulbs and their specific removal techniques will help streamline the process and ensure a smooth experience.
Keeping this guide in mind for future reference and incorporating these practices into your home maintenance routine will ensure that you enjoy the benefits of well-functioning and visually pleasing recessed lighting. In conclusion, we hope that this resource has been helpful and informative, empowering you to take on your next DIY bulb replacement with confidence and ease.
FAQ
How can I tell what type of bulb I need for my recessed lighting?
Look for markings on the existing bulb or fixture to determine the bulb type, such as BR, MR, PAR, or R. The size of the recessed can, wattage, and type of the bulb are essential factors to consider when selecting a replacement.
What should I do if the bulb is too high or difficult to reach?
Use a ladder or specialty light bulb changing poles with multiple attachments to safely access and remove the bulb. Always prioritize safety when working with high or hard-to-reach bulbs.
What is the best way to deal with a hot or stuck bulb?
Allow the hot bulb to cool before attempting removal. For stuck bulbs, use loops of duct tape or specialized tools like a suction cup attachment to aid in the removal process without damaging the fixture.
Are there any specific techniques for removing different types of bulbs?
Yes, each bulb type may have a unique removal and installation process. Understanding the specific type within your fixture will help you plan the appropriate removal method, whether it’s using spring clips, twisting counterclockwise, or other methods.
When should I consult a professional for bulb replacement in recessed lighting?
Consult a professional if you’re uncomfortable or uncertain while attempting to change a bulb, or if specialized lighting systems are in place. Doing so can prevent damage, ensure safety, and provide expert guidance for long-term optimal lighting performance.
How should I dispose of used light bulbs?
Proper disposal includes understanding the type of bulb being replaced and following local regulations for disposal or recycling. This is especially important for LED or other specialty bulbs to minimize environmental impact.


Eric
Wow, who knew removing a bulb could be so complicated? Maybe Ill just stick to candles.