

Are you wondering if you can cut your LED lights to fit a specific space? Knowing which LED lights you can safely cut—and how to do it—can save you time, money, and frustration.
Cutting the wrong type of LED strip can damage your lights or cause them to stop working. You’ll discover exactly which LED lights are designed for cutting, where to make the cuts, and how to do it without ruining your setup.
Keep reading to get the confidence you need to customize your lighting perfectly.
Types Of Led Strip Lights
LED strip lights come in various types to suit different needs. Choosing the right type affects how you cut and use them. Understanding the main types helps you pick the best fit for your project.
Flexible Vs Rigid Led Strips
Flexible LED strips bend easily around corners and curves. They work well for tight spaces and creative shapes. Rigid LED strips are stiff and straight. They suit places needing firm, straight lighting lines. Cutting rules differ for each type due to their build.
Single Color And Rgb Variants
Single color LED strips emit one color only. Common colors are white, red, blue, or green. RGB LED strips can change colors using a controller. They offer more lighting options and moods. Cutting points depend on color and wiring layout.
Waterproof And Indoor Strips
Waterproof LED strips have a protective coating. They resist water, dust, and moisture. Ideal for outdoor or wet areas like bathrooms. Indoor strips do not have this cover. They fit dry, indoor spaces only. Cutting must keep the waterproof seal intact for outdoor use.
Cutting Guidelines For Led Strips
Cutting LED strips allows customization of length to fit various spaces. Following proper guidelines ensures the strips work well after cutting. This section explains how to cut LED strips safely and correctly.
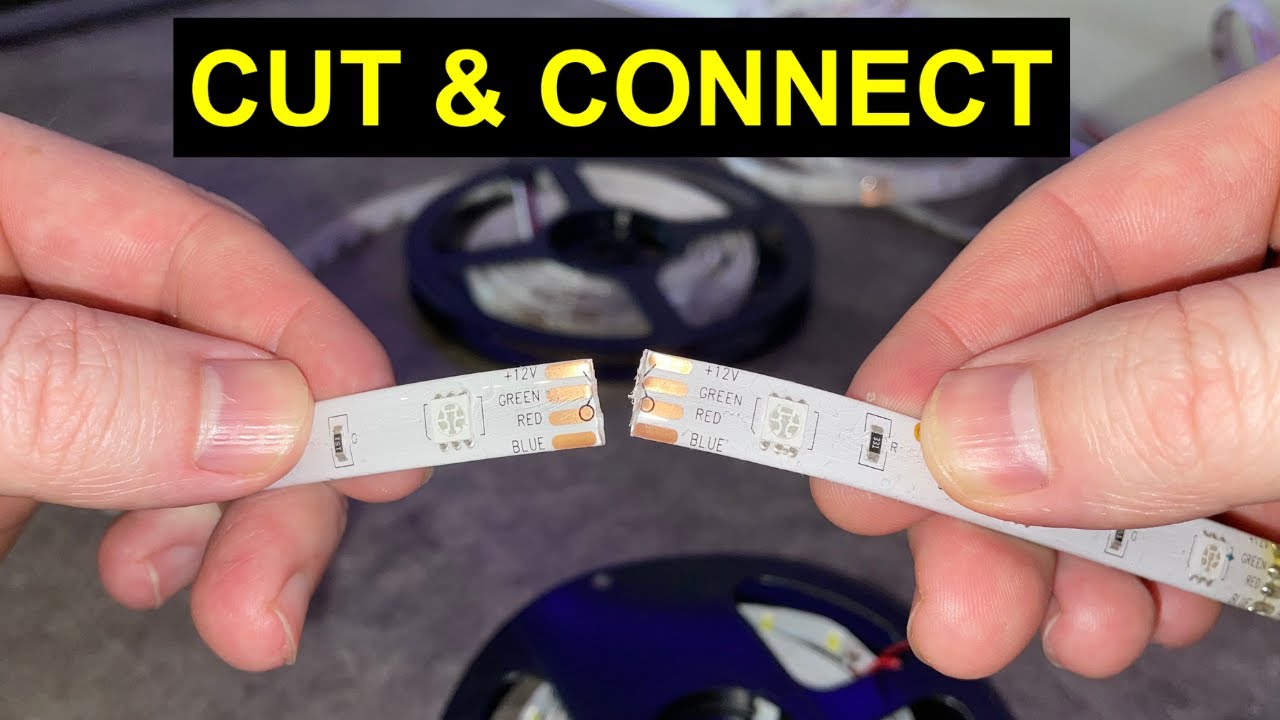
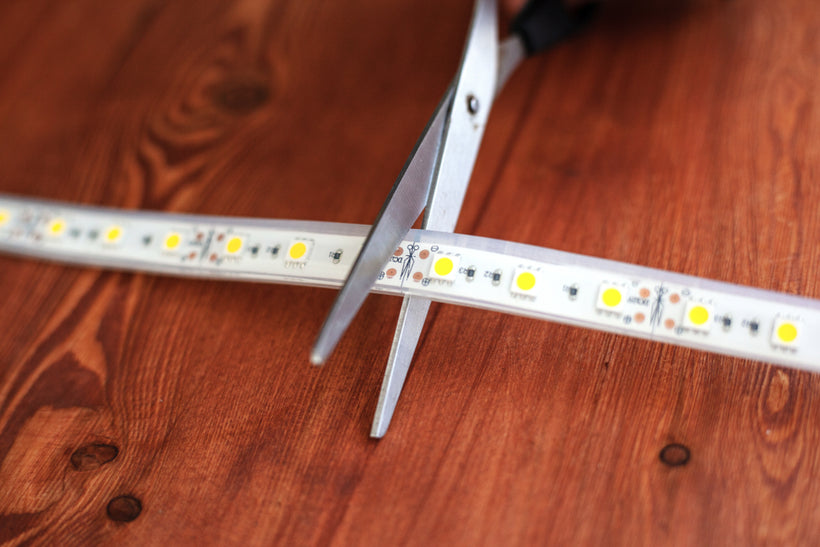
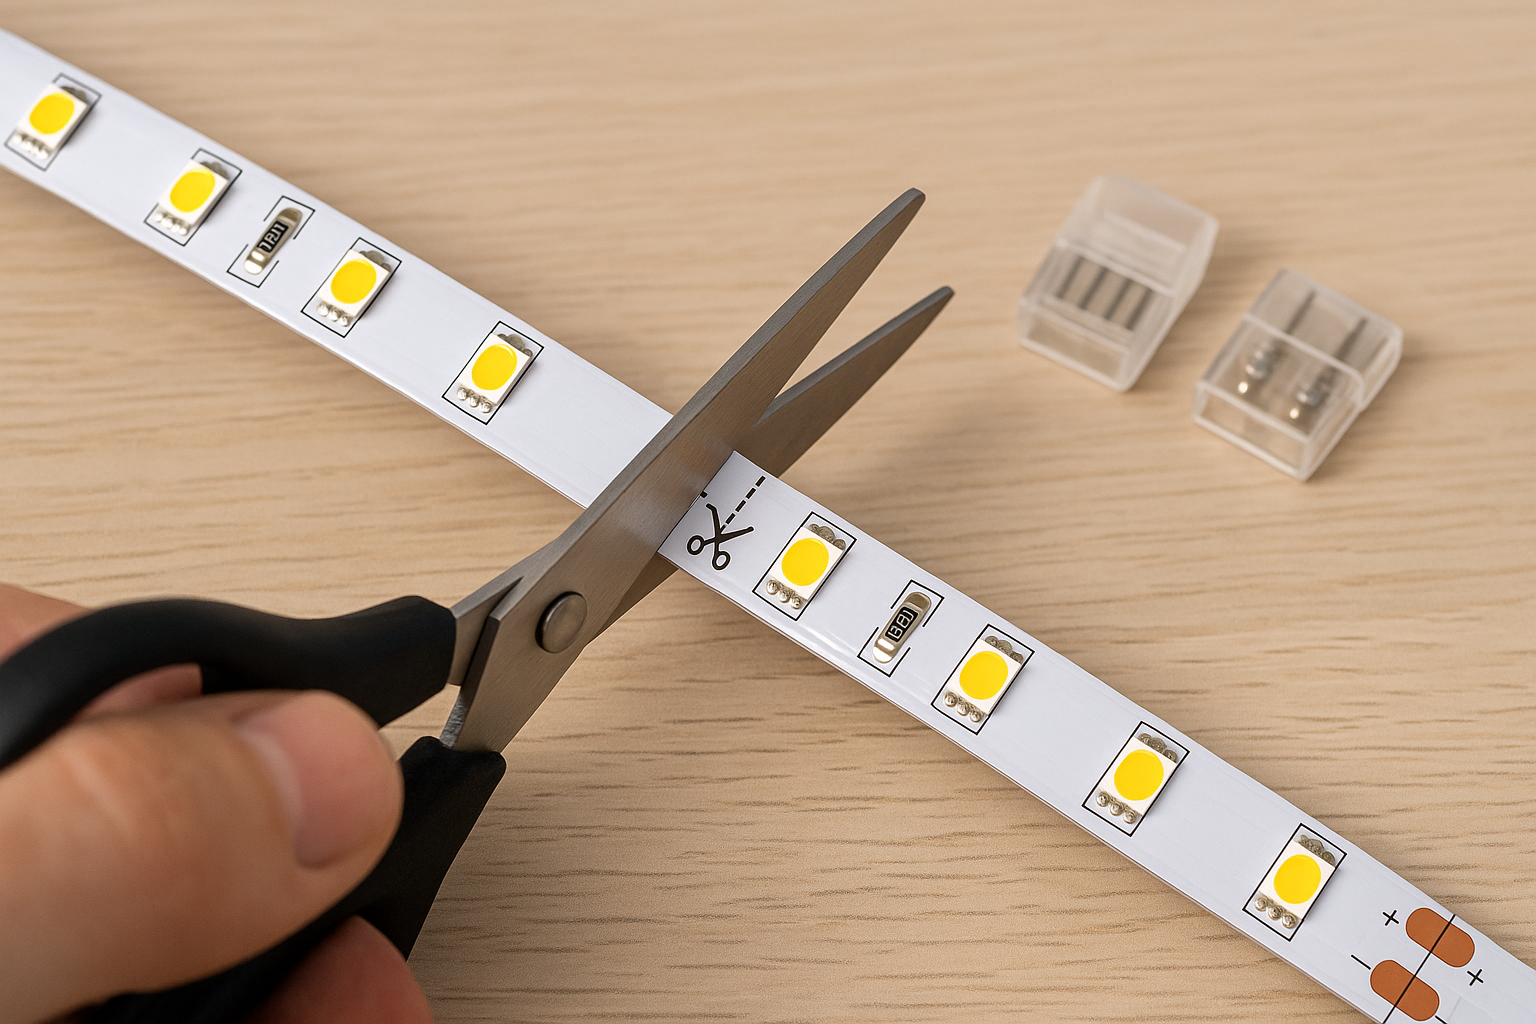
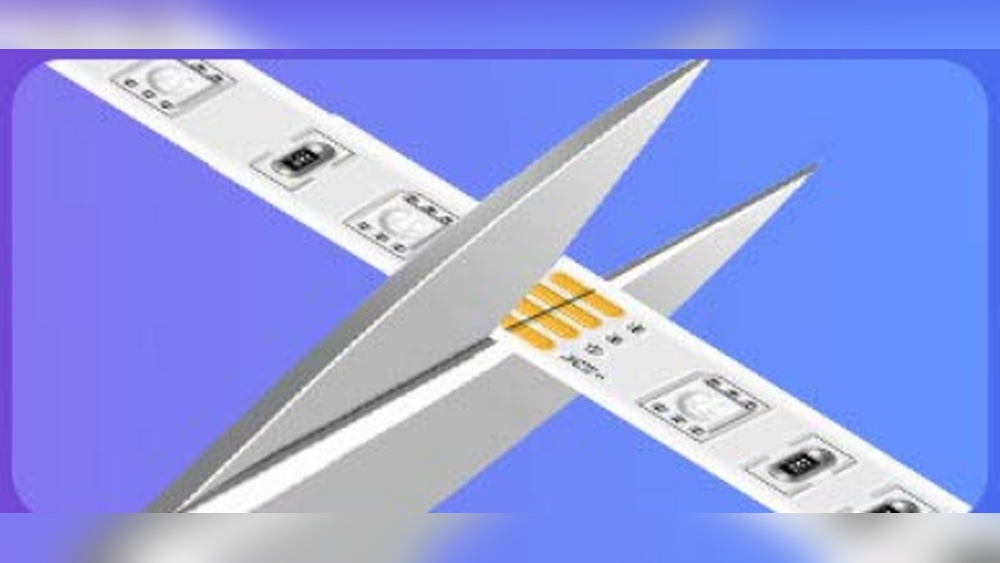
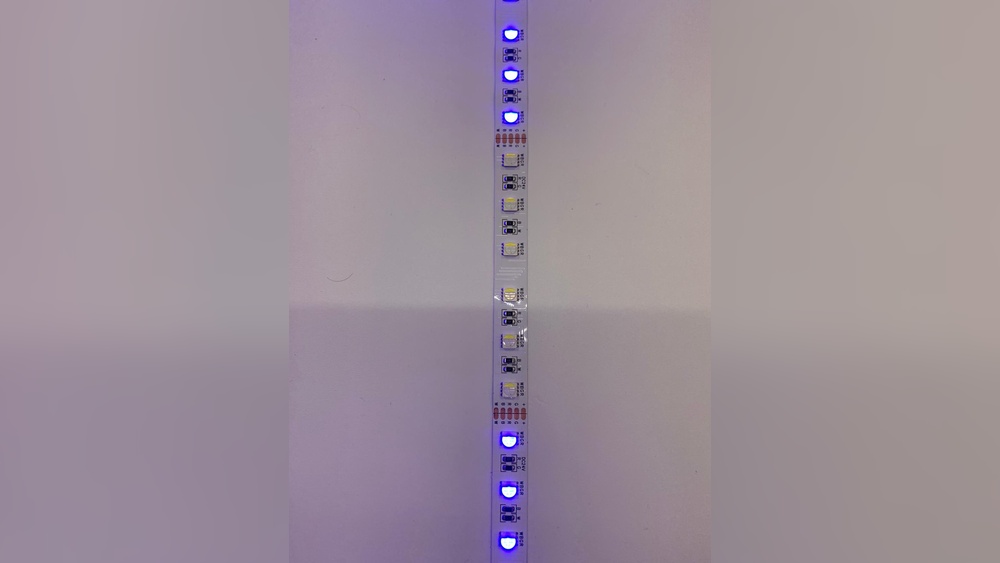
Identifying Cut Marks
LED strips have special marks showing where to cut. These marks are usually small lines or scissors icons. Cutting only on these marks keeps the circuit intact. Avoid cutting anywhere else to prevent damage.
Tools Needed For Cutting
Use sharp scissors or a craft knife to cut LED strips cleanly. A ruler helps measure the strip before cutting. Keep tools clean and sharp for a smooth cut. This prevents frayed edges and maintains good connections.
Safety Precautions
Always unplug the LED strip before cutting. Handle tools carefully to avoid injury. Work on a flat surface with good lighting. Keep the strip dry and avoid touching exposed wires after cutting.
Led Strips You Should Avoid Cutting
Not all LED strips can be cut safely. Cutting the wrong type can break the lights or cause electrical issues. Avoid cutting strips that do not support it. Knowing which LED strips to avoid cutting saves time and money.
Non-cuttable Rigid Led Bars
Rigid LED bars are solid and hard. They often have no clear points to cut. Cutting these bars can damage the circuit inside. The light may stop working after cutting. These bars are made for fixed lengths only. Use them as they are for best results.
Strips Without Marked Cut Points
Some LED strips lack marked cut points. These marks show where cutting is safe. Without marks, the strip’s wiring is continuous. Cutting anywhere can short the circuit or stop the lights. Always check for cut marks before cutting. If none exist, do not cut the strip.
How To Reconnect Cut Led Strips
Reconnecting cut LED strips is a common task for many DIY projects. Knowing how to do it properly saves money and avoids wasting strips. This guide explains simple ways to reconnect LED strips without damaging them.
Using Soldering Techniques
Soldering is a reliable method to join LED strips. First, carefully strip a small section of the strip’s copper pads. Use a fine-tip soldering iron to heat the pads. Then, apply a small amount of solder to each pad.
Next, align the two strip ends so the copper pads match. Hold them steady and press the soldering iron tip to melt the solder. The metal will bond the copper pads together. Let it cool before moving the strips.
This method creates a strong, durable connection. It works well for long strips or permanent fixes. Make sure to work in a well-ventilated area and use safety gear.
Clip Connectors And Alternatives
Clip connectors offer a quick way to reconnect LED strips. These plastic clips snap over the strip ends, holding them in place. They use metal contacts to link the copper pads without soldering.
To use, open the clip and insert each strip end. Close the clip to lock the strips. These connectors are easy to use and do not require special tools.
Other alternatives include wire connectors or conductive tape. Wire connectors join strips with small wires soldered or twisted together. Conductive tape sticks to the copper pads and conducts electricity.
Clip connectors and alternatives work well for temporary or adjustable setups. Choose the method that fits your project and skill level.
Power Considerations After Cutting
Cutting LED lights changes how much power they need to work well. Power matters a lot for safety and performance. After cutting, you must check the power needs carefully. The right power keeps your lights bright and long-lasting. Power problems can cause flickering or damage. Understanding power after cutting helps avoid these issues.
Voltage Drop Issues
Voltage drop happens when power loses strength along the wire. Longer wires or many LEDs increase this drop. After cutting, the length of the LED strip changes. This affects how much voltage reaches the lights. Low voltage makes LEDs dim or flicker. To fix voltage drop, use thicker wires or shorter runs. Check voltage with a meter to keep lights bright.
Adjusting Power Supply Needs
Cutting LED strips changes the total power needed. Less length means less power from the supply. Using a power supply too strong or too weak can cause problems. Too strong can overheat LEDs, too weak causes flicker. Calculate the new power based on strip length. Choose a power supply that matches the new demand. This keeps your LED lights safe and bright.
Common Mistakes In Cutting Led Strips
Cutting LED strips is a common task for many DIY projects. Mistakes during cutting can damage the strip or stop it from working. Knowing what to avoid is key to a successful project. Below are some common errors that people often make.
Cutting At Wrong Points
LED strips have specific spots where you can cut safely. These spots usually have a small line or scissors icon. Cutting anywhere else can break the circuit. This stops the lights from turning on after you cut.
Always look closely for the cut marks before making any cuts. Use sharp scissors or a knife for a clean cut. A rough cut might damage the strip and cause problems later.
Ignoring Polarity And Connections
LED strips work with positive and negative sides. Connecting them wrong can cause the lights to fail. Check the markings on the strip for “+” and “-” signs. Connect wires or connectors to match these signs exactly.
When joining strips or adding connectors, make sure the polarity matches. Wrong connections may burn out the LEDs or cause flickering. Take time to double-check connections before powering the strip.
Tips For Safe Diy Led Strip Projects
Working with LED strips can brighten up any space. Cutting and installing them yourself saves money and adds a personal touch. Safety is key. Follow simple steps to avoid damage and ensure your project lasts long.
Planning Your Layout
Measure the area carefully. Mark where you want the strips to go. Check the strip’s cutting points. Only cut at the marked lines on the strip. Avoid cutting in the middle of LEDs or circuits. Plan for power supply locations. This helps avoid long wires and voltage drops.
Testing Before Installation
Test the LED strip before fixing it in place. Connect it to the power source and check if all lights turn on. Look for flickering or dead spots. Fix any issues before sticking the strip down. Testing early saves time and effort later.
Frequently Asked Questions
Which Led Strip Lights Are Safe To Cut?
Only LED strip lights with marked cut lines are safe to cut. These lines show where the circuit can be safely separated without damage.
How Do I Know Where To Cut Led Lights?
Look for copper pads or scissors icons printed on the strip. Cutting should be done exactly at these points for proper function.
Can I Cut Any Length Of Led Strip Light?
No, you must cut only at specified intervals. Cutting between these intervals can break the circuit and cause malfunction.
What Tools Do I Need To Cut Led Lights?
Use sharp scissors or a precision knife for clean cuts. Avoid tearing or damaging the circuitry for best results.
Conclusion
Cutting LED lights safely needs the right knowledge and tools. Always check the strip’s cut marks before you cut. Cutting in the wrong place can break the light strip. Use sharp scissors or a knife for a clean cut. After cutting, connect the strip properly to avoid damage.
Small mistakes can cause the lights to stop working. Follow these simple steps to keep your LEDs bright and long-lasting. Now, you can customize your lighting without worry or confusion.


Leave a Reply