Embark with us on a thrilling journey towards becoming an avant-garde gardener. The journey begins by casting away the traditional gardening tools and engaging the exciting world of do-it-yourself (DIY) electronics. This article illuminates the path to creating your very own high-quality LED grow light. Complete with pocket-friendly prices, this DIY project costs approximately €107.95, $120.00, or £93.00. Plus, the finished product boasts a LED power projected to reach a robust 75 to 80 watts, perfect for a 50x50cm grow tent.
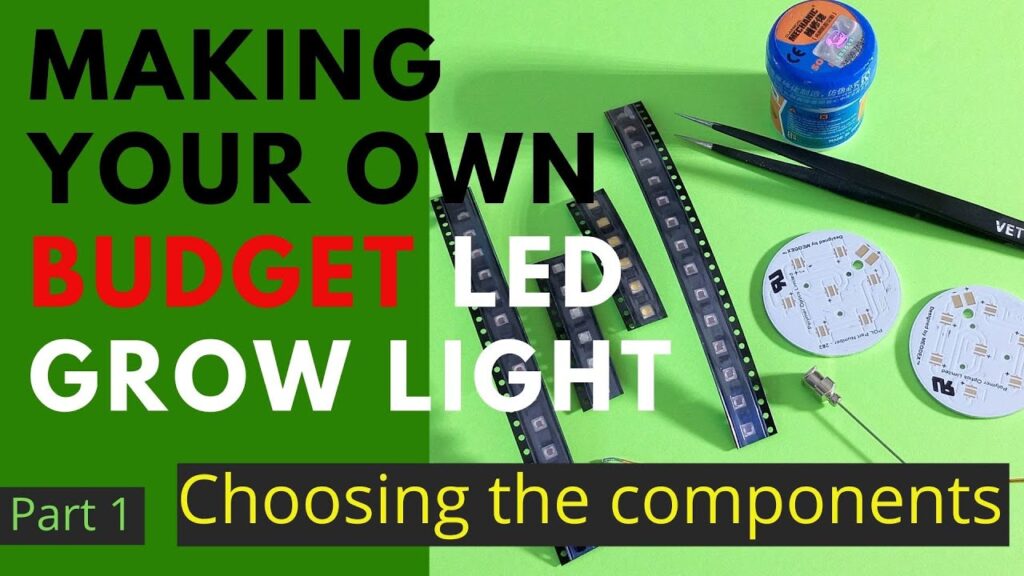
Stepping away from the beaten path, Plant Photonics presents a video introducing the world of thrift and tech craftsmanship with a custom LED grow light that allows the maximum customization and cost-saving benefits. The video provides an extensive tour, brushing over necessary tools, selection of LEDs, and comprehends the assembly process. Importantly, the video highlights why lead-free solder is best kept at arm’s length. A spectrum combination of 5 Red/Hyper Red to 1 Royal Blue and 1 4000K White is recommended, providing balance suitable for both vegetation and flowering stages. Buckle up! this unique DIY adventure beckons.
Section 1: Introduction to DIY LED Grow Lights
Introduction to the topic
Wonderful things are born from curiosity and the desire to create. Turning a simple concept into a hands-on project is not only educational but also deeply satisfying. We are channeling this passion into a series of instructional guides on creating your own DIY LED grow lights. For the green thumb in you, or the hobbyist seeking a new DIY adventure, constructing an LED grow light can help optimize your indoor plant setup while imparting a sense of accomplishment.
Benefits of DIY LED Grow Lights
Quality LED grow lights can be quite pricey, and with the DIY approach, we intend to bring down costs without compromising on quality. The total cost of the project is estimated to be around €107.95 ($120.00 or £93.00), a significant saving from commercial alternatives. However, the benefits are not confined to cost only. Being involved in the creation process allows you to customize the light spectrum to your plants’ specific needs, and the ultimate power of approximately 75 to 80 watts is sufficient for a 50x50cm grow tent.
Overview of the DIY process
We will guide you through selecting LEDs and MCPCB’s, preparing the aluminum tray for mounting, soldering LEDs onto circuit boards, connecting power supplies, and making key decisions regarding the LED spectrum. We will use Osram Oslon LEDs and a Mean Well power supply due to their superior quality and performance. In essence, we are setting an attainable path for you to design and build your LED grow light tailored to your preferences and needs.
Section 2: Equipment and Materials
List of required equipment
As with any DIY project, having the right tools to hand is crucial. The tools needed for this project are: tweezers, reading glasses, solder paste, applicators, heat sink compound, power supplies, and an aluminium plate. A selection of additional tools includes: ring bolts, locking nuts, a soldering iron, flux core solder, small wire cutters, small screws, a screwdriver, and a drill.
Choosing the right LEDs and MCPCBs
The heart of the LED grow light is the LEDs themselves. We recommend using the Osram Oslon LEDs that are available in the colors Red, Hyper Red, Royal Blue, and White. These LEDs are small in size, but potent in terms of performance. Accompanying the LEDs will be MCPCBs, which are Metal Core Printed Circuit Boards, crucial for setting up the lighting system.
Other necessary tools and components
Additional tools required for your DIY venture include soldering aids, heat sink materials, and an aluminium tray as the body of the light. Essential components like power supply cables and connectors also need to be considered. Every piece serves a purpose, contributing to the final product – a bespoke, highly-efficient LED grow light.
This image is property of i.ytimg.com.
Section 3: Step-by-Step Instructions
Preparing the aluminum tray
The aluminum tray serves as the body for the LED grow lights. Begin by securing the tray and thoroughly cleaning its surface. Then, measure and mark the positions for the circuit boards.
Soldering the LEDs onto the circuit boards
Soldering is a key step and requires patience and precision. Using your solder paste and applicators, carefully solder the LEDs onto the circuit boards. It is advised to use lead-tin flux core solder to secure the LEDs rather than a lead-free type, which can be challenging to work with.
Mounting the circuit boards onto the tray
Once the LEDs are soldered onto the circuit boards, they need to be mounted onto the aluminum tray. Apply a thin layer of heat sink compound between the circuit board and the tray for efficient heat diffusion. Then, use small screws to secure the boards onto the tray.
Connecting the power supply
Connect the power supply to the circuit boards using a proper set of cables. A Mean Well power supply will be an excellent choice due to its adjustable settings and optional dimmer switch.
Section 4: Selecting the Right Spectrum
Understanding different LED spectra
LEDs come in various color spectra. The correct choice can significantly affect your indoor planting efforts. Red and Hyper Red LEDs contribute to the plant’s fruiting and flowering process, while Royal Blue and White LEDs are suitable for promoting vegetative growth.
Choosing the optimal spectrum for vegging and flowering
The recommended spectrum for the best vegging and flowering results is 5 Red/Hyper Red to 1 Royal Blue to 1 4000K White, which gives an approximate red/blue ratio of 5.5:1. It’s, however, not a rigid rule, with the ratios adaptable to different plant types and light preferences.

This image is property of images.pexels.com.
Section 5: Finding the Parts
Recommended sources for purchasing parts
Finding the right parts at the best prices can be a bit of a treasure hunt. Thanks to the internet, various sites across Europe and the US serve as reliable sources for ordering parts. The guiding principle should be seeking quality and affordability.
Comparing prices and availability
Different websites offer different prices for the same item, so thorough research and comparison can save you valuable cash. Also, ensure you track availability, so that your project is not stalled due to a shortage of parts.
Section 6: Tips and Troubleshooting
Avoiding lead-free solder
As noted in the instructional video, lead-free solder is not recommended. While it might seem safer, it can actually prove challenging to work with and yield less satisfactory results.
Repairing broken LED grow lights
A DIY project teaches you about each component and its function. This knowledge proves useful when dealing with a broken LED grow light, as you can often diagnose and even fix issues rather than scrapping the entire system.
Troubleshooting common issues
From faulty connections to overheating, various issues can arise during the project. We will delve into common problems and solutions, giving you the knowledge to troubleshoot and overcome hurdles.

This image is property of images.pexels.com.
Section 7: Cost and Efficiency Considerations
Estimating the total cost of DIY LED grow lights
From LEDs to power supplies, every component has a cost. Keeping a list and tally of these helps avoid surprises and allows you to stay within your budget.
Calculating power and efficiency
The LED power of the finished light is projected to be 75 to 80 watts, optimal for a 50x50cm grow tent. However, the joy of DIY is that you can tweak and customize to achieve the efficiency and power output you desire.
Comparing DIY vs. commercial options
Undeniably, commercial options are readily available. Still, their price tags are often hefty, and they lack the possibility for customization. Building an LED grow light yourself presents the satisfaction of creativity, considerable cost savings, and a highly personalized approach to your indoor plant setup.
Section 8: Safety Precautions
Electrical safety guidelines
It’s no secret that messing with electricity can be hazardous. Throughout the process, ensuring your safety should be a priority. Use insulated tools, disconnect power before making adjustments or repairs, and always handle electrical components with care.
Proper handling of soldering equipment
Soldering can push you to the brink of creativity, but also poses its own risks. From burns to inhaling harmful fumes, mishandling soldering equipment can result in accidents. Always ensure proper ventilation, wear safety glasses, and use a stable, heat-resistant work surface.
Preventing overheating and fire hazards
LED grow lights can generate a significant amount of heat. Incorporate proper cooling mechanisms to prevent overheating. Use appropriate heat sink compounds, and always give the system ample time to cool down before handling.
This image is property of images.pexels.com.
Section 9: Conclusion
Summary of the DIY LED grow light process
Building your LED grow light opens up a world of customization. Despite the intricate-seeming process involving spectrum selection, soldering, and power supply considerations, we hope this comprehensive guide makes it approachable and exciting. The satisfaction of watching your plants thrive under a light system you built yourself is unparalleled.
Final thoughts on DIY vs. commercial options
Yes, you can walk into a store or browse online to purchase a fancy LED grow light, but the price, lack of customization, and impersonal aspect of commercial options cannot compare to the DIY route. We believe the journey of creating your LED grow light is paved with learning, fun, and eventual pride at the fruits of your labor (or, in this case, your plants!). We welcome you on this illuminated DIY journey.
Creating a high-quality LED Grow Light from Scratch: Part 1
Essential items you need
Have you considered crafting your own LED grow light? Maybe you’re looking to reduce costs, desire a light with a personalized spectrum, or simply take pleasure in growing plants under a light of your own design and creation!
These videos will walk us through the process of creating our own high-quality LED grow light at home at a notably smaller cost, using readily available or inexpensive equipment.
The total cost amounts to only €107.95 or $120.00 or £93.00!
Our finished light will have an LED POWER between 75 and 80 watts, ideal for a grow tent of 50x50cm. We can of course create four to fill a 100x100cm tent.
With Osram Oslon LEDs and a Mean Well power supply, our light will be of exceptionally high quality. The varying beam angles recommended from the LEDs we’ll be using should not be a cause for worry—it will not affect its use.
The spectrum is 5 Red/Hyper Red to 1 Royal Blue to 1 4000K White, typically yielding a red/blue ratio around 5.5:1. This is a well-rounded spectrum that’s successful for both vegetating and flowering. Of course, we can amend it as we want—all part of the fun in creating our own light!
In this video, we’ll go over parts needed for creating your light.
Selection of LEDs and MCPCB’s
Tweezers and potentially Reading Glasses (the LEDs are small!)
Solder paste and applicators
Heat Sink Compound
Power Supplies
Aluminium Plate (for assembly)
We’ll be demonstrating how to assemble everything (including at-home DIY reflow soldering) and apply skills to mend broken LED grow lights by swapping out faulty LEDs in upcoming videos!
If you’d rather not create your own light, buy from us!
New lower prices can be found on our high-quality Energy series lights at:
Follow us on:
Facebook – / ledgrowtechnology
Instagram – / plantphotonics
Pinterest – https://www.pinterest.es/plantphotonics/
BOM (Bill Of Materials)
Supplies and Accessories
We will also need:
4 x 4mm or 5mm ring bolts and 4 x locking nuts to fit them
Wrench or pliers for the nuts mentioned above.
soldering iron
lead/tin flux core solder (1mm) to solder WIRES onto the circuit boards.
Small wire cutters
Small screws (18) to fit the circuit boards
Small screwdriver to fit the small screws.
1mm drill or sharp thin nail.
Aluminium Pan €5.50 bough locally.
We can procure supplies like solder paste, heat sink compound (thermal paste), and tweezers from a range of locations, including eBay and Aliexpress. We should avoid purchasing lead-free solder—it’s challenging to use and is an inferior product.
Mechanic brand solder paste €3.00 ($3.32) incl. postage.
https://www.fasttech.com/products/0/1…
Heatsink Compound (thermal grease) Halnziye HY710 20 grams ($1.69) £1.32 €1.54
https://www.ebay.co.uk/itm/20g-Silver…
Tweezers Vetus ESD-11 €1.18 ($1.37)
https://www.fasttech.com/products/0/1…
Connectors – Wago 221 Terminal Block Connector, 2 WayTerminals, 24 → 12 AWG Cable Mount
RS Part number 883-7544 £3.91 (€4.55) for 10. We only need 4.
https://uk.rs-online.com/web/p/non-fu…
Wire and Plugs
Wire – Hew Heinz Eilentropp Blue, 0.26 mm² Hook Up Wire 5m £2.81 (€3.27)
This is silicon sheathed meaning it’s very flexible and difficult to accidentally melt with the soldering iron.
https://uk.rs-online.com/web/p/hookup…
Power cable and plug (bought locally)
LEDs and MCPCB´s:
Red 630nm – Osram OSLON SSL 80 GR CS8PM1.23-JUKQ-1-0 €1.04 (£0.89)
We’ll need 15 (3X pack of 5)
https://uk.rs-online.com/web/p/leds/1…
Hyper Red 660nm Osram Opto OSLON SSL 120 GH CSSPM1.24-4T2U-1-0 (£0.93)
Buy 15 (3X pack of 5)
https://uk.rs-online.com/web/p/leds/1…
Royal Blue 445nm Osram OSLON SSL 150 LD CQDP-2U3U-W5-1 £0.64 (€0.75)
We’ll need 6 (3X pack of 2)
https://uk.rs-online.com/web/p/leds/7…
White LEDs Osram Opto OSLON SSL 150 GW CSHPM1.EM £0.43 (€0.50)
Buy 10 (2 packs of 5)
https://uk.rs-online.com/web/p/leds/8…
Osram Oslon 7 LED MCPCB €2.40. We’ll need 6.
https://www.led-mounting-bases.com/en…
Power Supply
Power Supply 90 Watts Mean well HLG-80H-C700 (this is the dimmable version) £36 (€42)
https://uk.rs-online.com/web/p/led-dr…
The non-dimmable version is €39 (£33.50)
https://www.tme.eu/es/en/details/hlg-…
FULL COST: €107.95 or £93.00


